
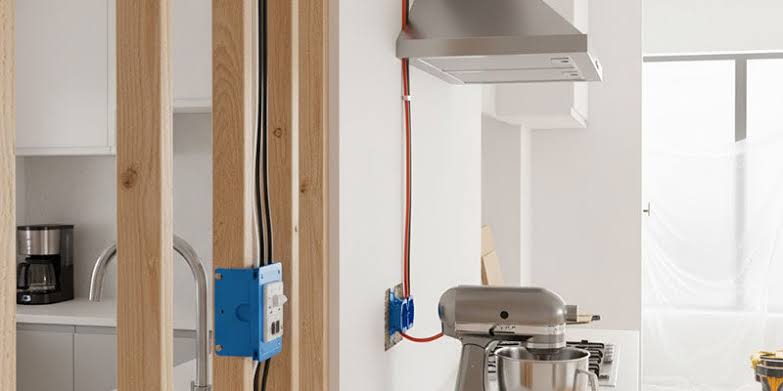
Kitchen Electrical Planning That Prevents Headaches After the Remodel
A beautiful kitchen that trips breakers or leaves you cooking in shadows loses its shine fast. If you are renovating, sketch the electrical plan as early as your cabinet layout. Safe, code-compliant power for high-demand appliances, layered lighting with sensible controls, and enough outlets where you actually prep and plug in are decisions that work best on paper before the drywall goes up. This article walks through the constraints that shape a smart kitchen electrical plan, common mistakes that lead to inspection delays or frustrating daily use, and practical ways to future-proof your wiring without overcomplicating it.
- Start With Appliance Loads and Panel Capacity
List every appliance you will install and note whether it is gas or electric, its nameplate wattage, and whether it calls for a dedicated circuit. Ranges and wall ovens often need a 240-volt feeder; microwaves, dishwashers, disposals, and many refrigerators work best on their own 120-volt circuits; and multiple 20-amp small-appliance circuits serve countertop receptacles. With that load snapshot, check your service panel for available breaker spaces and overall capacity. Resources such as the Candela Electric residential electrical page can help you understand common residential circuit types as you map your list.
If your panel is crowded, decide early whether to add a subpanel, legally consolidate circuits, or free up space by retiring obsolete circuits. A subpanel near the kitchen shortens cable runs and makes future changes easier, but it adds cost and requires neutrals and grounds to remain isolated. Packing too many new breakers into a marginal main panel invites nuisance trips when the oven preheats and the microwave runs. Bringing an electrician in at the planning stage to do a load calculation can prevent expensive mid-project changes.
- Put Task, Ambient, and Accent Lighting on Separate Controls
Lighting that supports cooking, conversation, and cleanup rarely comes from a single fixture. Start with task lighting: under-cabinet LED strips or pucks that illuminate counters without casting hand shadows, plus focused fixtures over the sink and range. Next, choose ambient sources like recessed cans or a low-glare center fixture to fill the room. Finally, add accent lights such as pendants over the island or toe-kick LEDs for night lighting. Put each layer on its own switch so you can brighten prep zones without blasting the whole room.
Plan switch locations while you can still move studs and boxes. A 3-way switch for the main lights at both the kitchen entry and by the garage door reduces fumbling with groceries. Dimmers on ambient and pendant circuits make the space adaptable for dinner with guests versus a late-night snack. Avoid mixing dissimilar loads on one dimmer; for example, keep under-cabinet LED drivers on a compatible control rather than tying them to a line-voltage dimmer meant for incandescent cans.
- Safe Countertop and Island Receptacles Without Clutter
Countertop receptacles should serve the spaces where mixers, coffee makers, and blenders actually live, not merely satisfy a drawing. A common mistake is skimping on outlets near the primary prep area, forcing power strips on the backsplash or cords stretched across a cooktop. Plan for tamper-resistant receptacles along the backsplash, and consider adding a receptacle in a nearby pantry shelf for a microwave if you want clear countertops. On islands, low-profile pop-up receptacles can provide access without visible boxes, but verify your countertop material and thickness can accept the hardware before fabrication.
Expect ground-fault protection on kitchen receptacles, especially near sinks, and note that many jurisdictions now require GFCI protection even for hardwired dishwashers. Many 120-volt kitchen circuits also need arc-fault protection, either at the breaker or via listed devices, to reduce the risk of arc-related fires. For convenience, you might add a couple of USB-C receptacles for charging small devices, but keep heavy loads off them. Group small appliance outlets on multiple 20 amp circuits rather than crowding everything on one; this reduces breaker trips when the toaster and espresso machine run together.
- Dedicated Circuits for High Demand Appliances
Assign dedicated circuits to appliances that warrant them: a built-in microwave or speed oven, dishwasher, garbage disposal, refrigerator, wine cooler, and warming drawer are typical candidates. If you are choosing an induction range or electric double oven, plan for an appropriately sized 240 volt circuit and verify that the cable route can handle the bend radius and box fill where it terminates. Even with a gas cooktop, you still need a 120-volt receptacle for the igniter and a connection for the range hood. Label these circuits clearly in the panel so you can isolate them quickly for service.
Consider a realistic scenario: a 1950s home with a small service panel feeding the kitchen on only two old circuits. The remodel introduces a microwave, dishwasher, and a larger refrigerator. Instead of daisy-chaining the microwave onto the refrigerator circuit, a better plan is to add a subpanel near the kitchen with space for dedicated breakers and modern dual-function AFCI/GFCI protection where required. The trade-off is upfront cost versus daily reliability and safety. Squeezing modern loads onto undersized circuits invites trips, overheated conductors, and inspection setbacks.
Protection, Testing, and Labeling Before You Close the Walls
Decide where to place protective devices. Dual-function breakers that combine AFCI and GFCI can simplify protection on many 120-volt kitchen circuits, while point-of-use GFCI receptacles help when downstream wiring is complex. A whole-home surge protector at the panel adds another layer of protection for electronics inside ranges, refrigerators, and smart lighting controls. Watch for details that cause headaches later: don’t overfill junction boxes; respect cubic-inch box fill ratings; pigtail neutrals instead of doubling them under a single terminal; and keep cable entries organized to avoid staples and bends that damage insulation.
Before insulation, do a rough-in walkthrough with your plan in hand. Use a circuit tracer or temporary power to test switch legs and confirm 3-way switches operate as intended. Verify that under-cabinet lighting power feeds land in accessible locations, not trapped behind tile. After trim out, use a receptacle tester and the test buttons on GFCI devices and breakers to verify function, then label the panel directory with plain language: Refrigerator, Island Outlets, Under Cabinet Lights, Dishwasher, Disposal. Leave a copy of the circuit map in the kitchen manual drawer. Those ten minutes of documentation make resets, maintenance, and future upgrades far less disruptive.