
How to Choose a Commercial Tent for Stylish Outdoor Events
A well-chosen tent does quiet work at a party. It sets the mood, shelters guests from a passing shower, and keeps a garden wedding or rooftop reception looking polished. In New York, it also has to meet local rules for permits, fire safety, and anchoring. The goal is to choose a structure that looks beautiful and works safely, without your guests noticing the logistics behind it.
This guide walks through the decisions in the order that matters, from footprint to finishes, with the local details a Manhattan host should confirm early.
Quick picks by look
Start with the feeling you want, then let the practical tradeoffs narrow the field.
- Coastal and romantic: a sailcloth pole tent, known for soft, glowing peaks. It looks best when staked into a lawn.
- Minimal and architectural: a clear-top frame or clearspan tent for open sky and skyline views, paired with a cooling plan.
- City terrace or courtyard: a frame tent with sidewalls, which needs no center poles and works well with liners and lighting.
- Sun-sensitive daytime parties: an opaque top with a lined ceiling for shade and steadier temperatures.
In general, sailcloth suits a nautical or romantic setting, while frame tents are often chosen for stability, weather protection, and flexible layouts.
Step 1: Capacity and footprint
Size the tent before choosing finishes. A common planning rule is about 15 square feet per seated guest or about 8 square feet per standing guest. Then add roughly 20 percent for a dance floor, buffet, bar, and catering prep.
One detail hosts often miss is the rain plan for cocktail hour. If the weather turns, everyone should be able to fit under cover at the same time, not just the dinner guests.
Step 2: Read your site
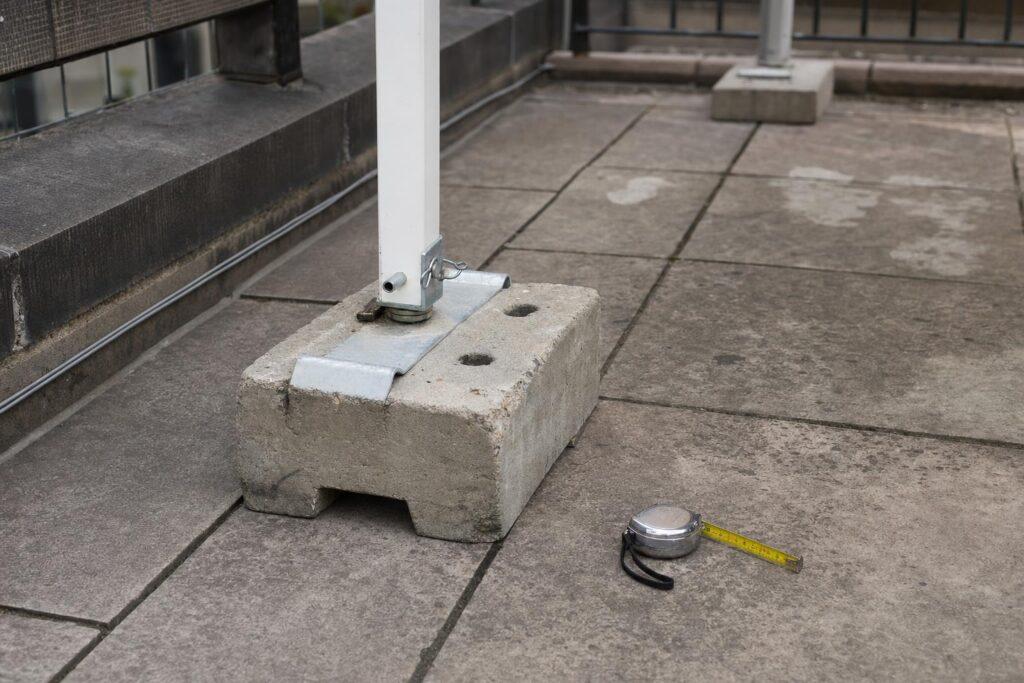
Grass, gravel, stone, and concrete all affect how a tent is secured. On lawns, tents are usually staked. On hardscape, including many Manhattan terraces and courtyards, expect ballasting with weights instead. The American Tent Association’s Tent Rental Division publishes ballasting tools for non-engineered tents, but your vendor should follow the manufacturer requirements or an engineered plan for your specific site.
Step 3: Compare tent styles for different looks
Here is how the most common options behave in plain terms.
Sailcloth pole tents
The translucent fabric creates a warm evening glow and dramatic peaks. Center poles are part of the look. These tents rely on staking, so they are best for open lawns rather than pavement.
Frame tents
No center poles means a clear, flexible interior that works well on rooftops and in courtyards. Frame tents also take liners, drapery, and hanging lighting easily, which makes them a strong choice for designed events.
Clear-top frame tents
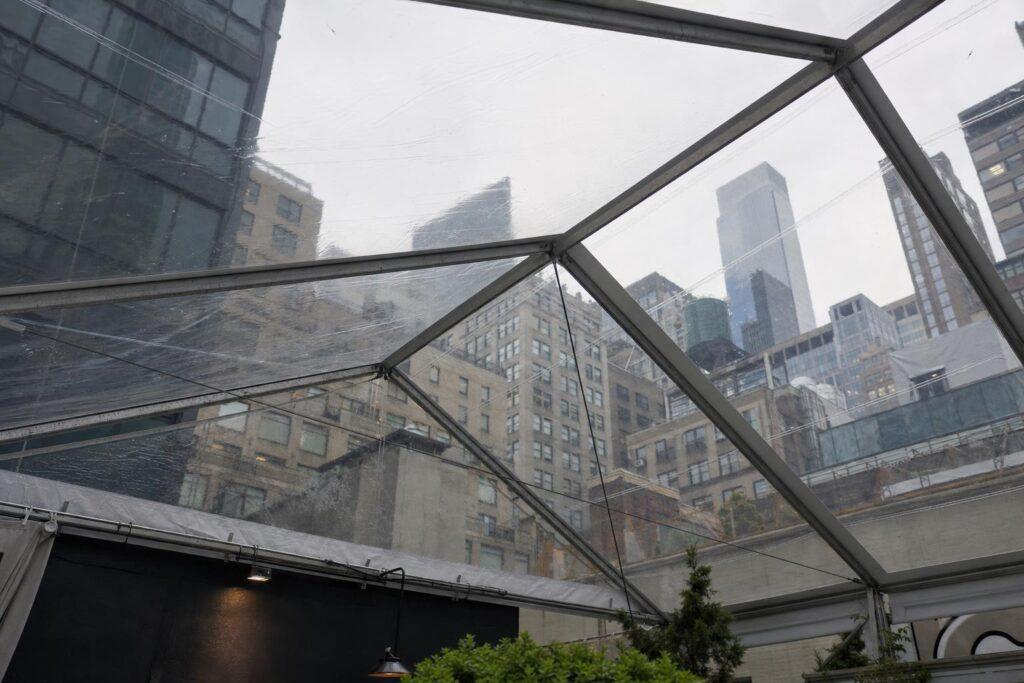
These tents deliver open sky and skyline drama. The tradeoff is heat: clear tops can feel like a greenhouse on sunny days, so ventilation or cooling is essential. Manufacturers also caution that clear vinyl can stretch or distort above roughly 85 degrees Fahrenheit and may be more prone to water ponding.
Keder and clearspan systems
These track-based frames suit sleek, custom builds. They look architectural and modular, but they usually take longer to install than simpler frame tents.
For a quick visual tour of common styles and accessories, including sidewalls, clear tops, and keder-track frames, browse a commercial tent gallery while you refine your short list.
Step 4: Plan for the season and comfort
Check the forecast the week of your event. The CDC and NOAA offer a HeatRisk tool with a seven-day, color-coded heat forecast, which can be a useful input for a summer date.
For cooling enclosed spaces, a practical rule of thumb is about 12,000 BTUs per 100 square feet. For tent heating in cooler months, plan around 20 BTU per square foot, adjusted for conditions. Aim for shade by day and airflow by evening, and keep a contingency for fans, spot coolers, or heaters if the forecast shifts.
Step 5: NYC permits and safety, kept simple
Local rules control, and codes change, so confirm details with the authority having jurisdiction before you commit. As general guidance:
- In New York City, temporary tents under 400 square feet used for no more than 30 days are exempt from a Department of Buildings permit. Larger temporary tents require a permit.
- For a Temporary Use Permit, NYC DOB requires a Registered Design Professional to submit the application at least 15 business days before construction or use begins.
- Under New York State code guidance, open-sided tents of 700 square feet or less with a 12-foot separation from other tents or structures may be set without a permit, while tents over 400 square feet generally require permits and fire-official approval.
- Code references require proof that tent textiles meet NFPA 701 flame-propagation criteria, certified by an approved testing laboratory. Confirm the current standard for your event date.
Also note that the 2025 Fire Code of New York State is effective December 31, 2025, so events from late 2025 onward should be checked against the updated provisions. Treat this section as a starting point, not a substitute for official approval.
Step 6: Details that elevate the look
Finishes are where a rented tent starts to feel custom.
- Sidewalls: clear or windowed panels frame a view or close out weather.
- Liners and drapery: soften the ceiling and hide hardware.
- Lighting: chandeliers, uplights, and balloon lights shape the mood.
- Flooring: plank, carpet, or interlocking tiles help level uneven ground.
- Clear doors and vestibules: help keep conditioned air inside.
Because clear vinyl warms faster, use opaque or lined zones for food displays in summer.
Step 7: Rooftops and courtyards
Elevated and paved sites change the plan. Expect ballasting rather than staking, and coordinate elevator or load-in access early. Confirm weight limits, keep fire department access clear, and plan generator placement and cable runs so they do not cross guest paths. Standard event checklists for lighting, power, and restrooms are worth reviewing before install day.
Step 8: Your vendor brief
Bring a clear commercial tent brief to your first conversation so quotes stay comparable:
- Guest count, including seated versus standing plans
- Must-have visuals and the mood you want
- Surface type and any access limits
- Dates, times, and plan B triggers for wind, heat, or rain
- Power needs and ADA access
- Kitchen and prep footprint
- Liner, lighting, flooring, and sidewall choices
- Egress lighting, certificate of insurance, and any required engineering or stamp
Step 9: Budgeting without the guesswork
A commercial tent budget is driven by surface and ballasting, size and height, accessories such as flooring, liners, and doors, heating or cooling, power, and the labor of working in the city. Instead of focusing only on the base rental, hold some budget in reserve for a last-week weather pivot. Extra fans, heaters, or sidewalls can protect the event when the forecast changes. For broader outdoor tent rentals, compare setup choices against the same site constraints.
FAQ
Do small NYC event tents need permits?
Sometimes. NYC DOB exempts temporary tents under 400 square feet used for no more than 30 days; larger temporary tents need a permit, and the local approval authority controls.