
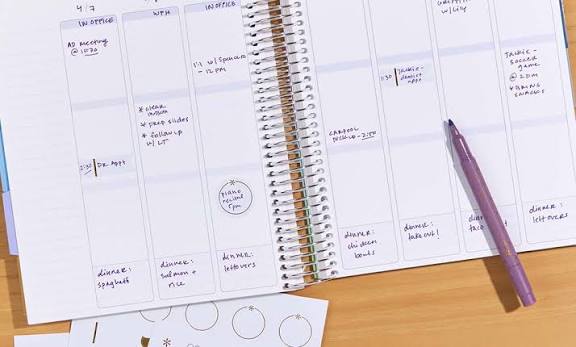
A Beginner’s Guide to Setting Up Your Weekly Undated Planner
In a world filled with digital reminders and constant notifications, many people are rediscovering the simplicity and effectiveness of a physical planner. These weekly undated planners, in particular, offers unmatched flexibility, allowing you to start anytime without wasting pages. Whether you’re managing work tasks, personal goals, or daily routines, learning how to set up your planner correctly can significantly improve your productivity and organization.
Why Choose a Weekly Undated Planner?
Unlike dated planners, undated versions allow you to customize your schedule without pressure. Missed a week? No problem, just pick up where you left off. This makes them ideal for beginners, busy professionals, students, and anyone seeking a more adaptable planning system.
Weekly layouts also provide a balanced overview. You can see your entire week at a glance, making it easier to allocate time effectively and avoid overbooking.
Step 1: Define Your Purpose
Before you start writing, take a moment to clarify how you intend to use your planner. Are you focusing on work tasks, personal development, fitness goals, or a combination of everything? Defining your purpose will guide how you structure each week and what sections you prioritize.
For example, if your primary goal is productivity, you may want to emphasize task lists and deadlines. If you’re aiming for balance, consider adding sections for self-care, habits, and reflection.
Step 2: Set Up Your Weekly Layout
Most weekly planners include space for each day and a notes section. Begin by filling in the dates for the current week. Then, break down your schedule:
- Assign key tasks to specific days
- Block time for meetings or appointments
- Include personal commitments such as exercise or family time
Avoid overcrowding your planner. A realistic plan is far more effective than an overly ambitious one.
Step 3: Prioritize Your Tasks
Not all tasks carry the same level of importance. Use a simple prioritization method, such as labeling tasks as high, medium, or low priority. You can also highlight critical tasks or use symbols to distinguish them.
Focusing on a few high-impact tasks each day helps prevent burnout and ensures consistent progress toward your goals.
Step 4: Incorporate Habit Tracking
One of the most powerful features you can add to your weekly planner is habit tracking. Whether it’s drinking more water, exercising, or reading daily, tracking habits builds accountability.
You can create a small checklist or grid within your weekly layout. Over time, this visual representation can motivate you to stay consistent and recognize patterns in your behavior.
Step 5: Leave Space for Notes and Reflection
A planner is more than just a scheduling tool—it’s also a space for reflection. Use the notes section to jot down ideas, reminders, or lessons learned throughout the week.
At the end of each week, take a few minutes to review what worked and what didn’t. This habit can help you refine your planning approach and make better decisions moving forward.
Step 6: Keep It Simple and Consistent
One common mistake beginners make is overcomplicating their planner setup. While it’s tempting to create elaborate layouts, simplicity is key to consistency. Choose a structure that is easy to maintain and stick with it.
Consistency is what transforms a planner from a notebook into a powerful productivity system.
Final Thoughts
Setting up a weekly undated planner doesn’t require perfection—it requires intention. By defining your goals, organizing your tasks, and building a routine, you can create a system that supports both productivity and balance.
Over time, your planner will evolve with your needs, becoming a personalized tool that helps you stay focused, reduce stress, and make the most of every week.