
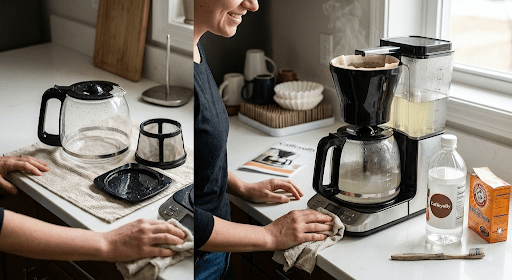
How to Clean a Coffee Maker: 9 Simple Steps
No one thinks about cleaning their coffee maker until the coffee stops tasting right. Sour, metallic, sometimes just… flat. That’s usually the first sign something’s built up in there that shouldn’t be. And it’s not just a taste problem — a dirty machine is warm, damp, and dark inside. Perfect conditions for mold. I’ve pulled apart reservoirs that hadn’t been cleaned in a year and found a film on the inside you could scrape off with a fingernail. Not pretty.
The fix is cheap and fast, though. A real deep clean every 1-3 months, plus thirty seconds of rinsing after each brew, and you’re basically covered. Here’s how we do it at Caffeyolly.
Why Regular Cleaning Actually Matters
Every brew leaves behind a thin layer of coffee oil and fine grounds coating the internal parts of the machine. On its own that’s manageable. However, when this problem is combined with the formation of hard water mineral deposits over the weeks and months, the problems become serious – pipes become clogged and slow down the brewing process, which is why learning how to clean coffee maker components regularly is essential. coffee becomes bitter or sour for no particular reason, and an environment of warmth and humidity where bacteria and molds love to thrive. Caffeyolly recommends staying on top of this routine so your machine just runs better. Simple as that.
Gather Your Supplies
Good news — you probably already have everything sitting in your kitchen right now:
- White vinegar (or a citric acid-based descaler if you want something gentler)
- Water
- Dish soap
- A soft cloth or sponge
- A small brush — an old toothbrush works great for this
- A paper filter, for the cleaning cycle
1. Do a Daily Rinse After every single brew, give it thirty seconds: Empty and rinse the carafe with warm water. Pull the filter basket out and rinse that too. Wipe down the exterior and the warming plate with a damp cloth while you’re at it. It feels almost too small to matter. But this one habit is what actually keeps oils from caking on between your deeper cleans.
2. Wash the removable Parts Weekly Take apart all the removable parts once a week – carafe, filter basket, lid of the water reservoir, any drip trays and clean everything in hot soapy water, rinsing well and leaving everything to air dry completely before assembling the coffee maker again. This is an important step, as not drying the parts properly makes the whole process somewhat pointless.
3. Descale the Machine Monthly Here’s the thing most people skip, and it’s the one that matters most. Hard water minerals are usually the real culprit behind a slow, bad-tasting brew — not old coffee residue like everyone assumes. The Caffeyolly method:
- Mix equal parts white vinegar and water (or a commercial descaler as per instructions).
- Throw a paper filter in the basket for catching the dislodged debris.
- Run a full brew cycle.
- Let that vinegar solution just sit in the carafe for 15-20 minutes.
- Pour it all out.
4. Run Two to Three Clean Water Cycles The smell of the vinegar stays on, so don’t rush through this step. Fill the reservoir with just water, run a complete cycle, throw the water out, and do the whole process again until you get rid of the vinegar smell completely.
5. Clean the Exterior and Buttons The outside gets just as grimy as the inside — arguably worse around the buttons, where coffee splatter and finger oils collect. Grab a soft, damp cloth with a little dish soap and go over the control panel, the warming plate, the housing, the handle. One thing I’d really push on: never spray liquid directly onto the machine. Spray the cloth first, always. Getting moisture into the electronics is how you end up buying a new coffee maker.
6. Don’t Forget the Water Reservoir This is the part almost everyone forgets, and honestly it’s where the worst buildup happens.A film builds up on the interior over time.Use a bottle brush with warm soapy water to clean it, and then rinse it and remove the lid for proper air drying. A moist closed container is a perfect breeding ground for mold.
7. Store It Right Between Cleans A few little things actually make a huge difference in this regard. Open the lid and the filter basket when you are done using your coffee maker to allow the water to evaporate. Do not allow any leftover coffee in the carafe. Rather pour it away. Also, ensure that your coffee maker is placed in a dry place.
8. Follow a Daily Maintenance Routine Having your coffee maker clean means all the difference in the world between a mediocre cup of coffee and an actual tasty one that makes you eager to start each new day. Follow the maintenance routine and get paid back in kind – improved flavor, increased lifespan, fewer smells from the tank. It takes only 30 seconds.
9. Enjoy Better Coffee with Caffeyolly Tips Keep your brewer fresh and enjoy your morning routine every single day.
The Final Sip
Taking just a few extra seconds to attend to your coffee machine is not only going to help it last longer but will also ensure that every cup of coffee served is fresh and delicious as intended. Learning how to clean coffee maker components with a quick cleaning every day and descaling every month, you are sure to eliminate any bitter taste, mold, and also make things easier for yourself. Just follow these simple tips and you are sure to enjoy the best coffee ever!