Helmet, Chest or Bike Mount: Which Sports Camera Angle Actually Looks Good
Mounting a camera is easy. Choosing an angle that still looks good after five minutes of riding is harder.
A helmet camera can feel fast and immersive but may move every time you look around. A chest mount shows more of the bike and your hands, yet sits lower and reacts strongly to body movement. A handlebar mount can create a clean forward-facing view, but vibration from the bike travels directly into the camera.
There is no single best position. The right choice depends on whether you want the viewer to feel like the rider, understand what the rider is doing or simply see the trail clearly.
Helmet mounts give the most natural point of view
A helmet-mounted camera places the lens close to where the rider is actually looking.
That makes it one of the most convincing first-person perspectives. When you enter a corner, look towards an obstacle or follow another rider, the camera naturally follows your attention.
For mountain biking, motorcycling or downhill riding, this can make footage feel fast and immediate.
The downside is exactly the same thing: your head moves constantly.
A quick glance towards a junction becomes a sudden camera pan. Looking down at the bike can send the horizon out of frame. Riders who naturally move their heads a lot may produce footage that feels more restless than expected.
A wide field of view helps because small framing errors are less obvious, but smooth head movement still matters.
Mount position on the helmet changes the result
Not all helmet angles look the same.
A camera mounted on top of the helmet gives a high viewpoint and a clear view ahead, but it can make the footage feel slightly detached from the bike. The rider’s hands and handlebars may barely appear.
A chin-area perspective usually feels lower and more connected to the action. It can include parts of the handlebars while remaining close to eye level, which often creates a stronger sense of speed.
Whatever position is used, the mounting method needs to be appropriate for the helmet and activity. Avoid drilling, modifying or attaching hardware in a way that conflicts with the helmet manufacturer’s safety guidance.
The best-looking angle is not worth compromising protective equipment.
Chest mounts make the rider part of the frame
A chest perspective produces a very different type of footage.
Because the camera sits lower, the viewer usually sees the rider’s arms, handlebars and part of the bike. That context makes steering, braking and body position easier to understand.
For technical mountain biking, this can be more interesting than a pure helmet view. The audience sees not only where the rider is going, but how the bike is being controlled.
A compact sports camera works particularly well in this position because a wide field of view can keep both the trail and the bike inside the frame without requiring precise aiming.
Chest mounting can also make speed feel more dramatic because the camera is closer to the ground.
Chest footage needs careful tilt
The most common chest-mount mistake is pointing the camera too far down.
When standing still, a view dominated by handlebars may seem acceptable. Once riding begins, the upper part of the trail can disappear and the final video becomes mostly arms, front wheel and ground.
It is usually better to angle the camera slightly higher than first seems necessary.
Your riding position matters as well. On a mountain bike, the upper body leans forward. On a road bike, the posture may be even lower. A camera that is perfectly level while you are standing upright can point towards the ground once you settle into your normal riding position.
Do a short test in the actual riding posture before committing to a long recording.
Handlebar mounting gives the cleanest fixed direction
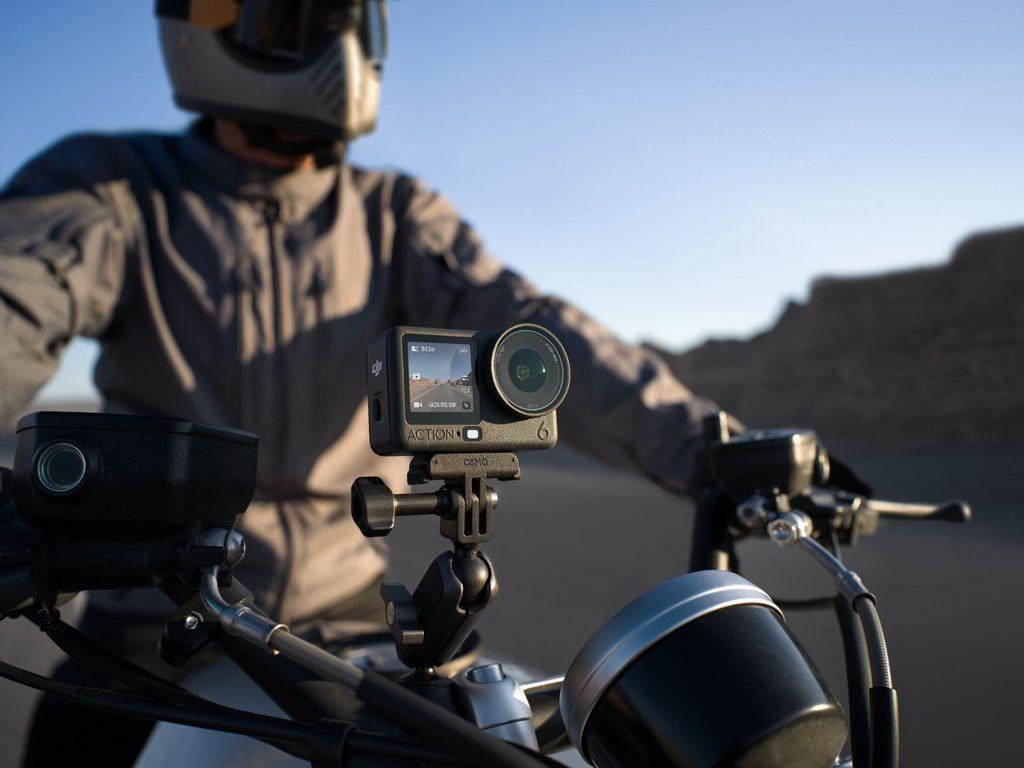
A handlebar mount does not follow your head or upper body. It follows the bike.
That creates a more consistent forward-facing perspective and can work very well for road cycling, touring and smoother trails.
It also gives the rider freedom to look around without sending the camera in another direction.
The trade-off is vibration.
Every small bump reaching the bars is transmitted towards the camera. On rough terrain, a rigid mount can therefore create much more high-frequency movement than a helmet or chest position, where the rider’s body absorbs part of the shock.
A secure mount, sensible placement and good electronic stabilisation become especially important.
Where you place the camera on the bike matters too
The handlebars are only one option.
A camera mounted closer to the centre of the bike often gives a more balanced view than one hanging far out to one side. Offset mounting can make the horizon and steering movements feel exaggerated.
Other fixed bike positions can create useful secondary angles. A seat-rail camera can look backwards towards another rider, while a low frame position can emphasise wheels and road movement.
These angles are often more effective as short cutaways than as the only view for an entire ride.
For a finished video, combining one main POV with a few alternative mounted perspectives usually looks more polished than recording everything from the same place.
Osmo Action 6 is particularly well suited to mounted POV footage
The DJI Osmo Action 6 is designed around exactly this kind of moving-camera use.
It uses a 1/1.1-inch square CMOS sensor with a 155° field of view and a variable aperture from f/2.0 to f/4.0. The wide view makes helmet and chest mounting more forgiving because the rider does not need to aim the camera with extreme precision.
The square sensor also enables 4K Custom recording at 3840 × 3840 up to 60fps.
That is especially useful when the mounting position cannot easily be changed during a ride. A larger square capture area gives more freedom to reframe the same footage horizontally or vertically afterwards rather than deciding on one social-media format before setting off.
For creators producing both landscape ride videos and vertical social clips, that flexibility can make a single mounted camera much more useful.
RockSteady is the everyday option for rough movement
Osmo Action 6 offers RockSteady 3.0 and RockSteady 3.0+ electronic stabilisation.
These modes are useful when the camera is attached to a helmet, chest harness or bike and needs to absorb the small rapid movements created by riding.
For a normal cycling or mountain-biking video, RockSteady is often the sensible starting point because it stabilises the image without forcing the horizon to remain permanently level.
That can preserve some of the natural feeling of leaning into a corner.
A perfectly fixed horizon is not always the most exciting look. In sports footage, some controlled lean helps communicate how the rider and bike are moving.
HorizonSteady is better when a level horizon matters
HorizonSteady takes a different approach.
It is designed to keep the horizon level even when the camera rotates significantly. On Osmo Action 6, DJI supports HorizonSteady and HorizonBalancing in compatible modes up to 60fps.
This can be useful for a helmet mount where head movement would otherwise make the horizon swing dramatically.
It is also valuable when a mount cannot be aligned perfectly before the ride.
However, stronger horizon correction changes the visual character of the footage. For aggressive mountain-bike turns, some riders may prefer RockSteady because it retains more of the natural lean.
The best mode therefore depends on whether stability or a stronger sense of movement is more important.
Use 4K/50 or 4K/60fps for most riding
For general cycling and mounted sports footage, 4K at 50 or 60fps is a practical choice.
It captures fast motion smoothly and still gives some flexibility for slow motion during editing.
Osmo Action 6 can also record 4K at up to 120fps, which is useful for short slow-motion sequences such as jumps, spray, technical sections or a rider passing close to the camera.
There is little reason to record an entire long ride at the highest frame rate simply because it is available.
Higher frame rates create larger files and are most valuable when you know the footage will actually be slowed down.
Which angle should you choose?
Choose a helmet mount when you want the footage to follow exactly where the rider looks. It is the strongest option for a true first-person feeling, provided head movement remains reasonably controlled.
Choose a chest mount when seeing the handlebars, hands and rider technique matters. It often produces the most immersive mountain-bike perspective, but the camera angle needs to be tested in the actual riding position.
Choose a handlebar mount when you want a consistent forward view and do not want head movement affecting the framing. It works particularly well on smoother surfaces, though vibration needs more attention.
For a more complete video, there is no need to choose only one. DJI offers mounting options for handlebars and cycling setups, while the Action 6’s magnetic quick-release ecosystem makes changing perspectives easier between sections of a ride. DJI’s current cycling combinations are specifically built around multi-angle capture rather than treating one position as universally best.
The best angle is the one that shows something useful
A dramatic mounting position can become boring if it shows the same composition for an hour.
Helmet footage shows attention and direction. Chest footage shows rider input. A bike-mounted camera shows the movement of the machine itself.
The strongest sports videos use those differences deliberately.
Osmo Action 6 is particularly useful for this workflow because its 155° view, square sensor, 4K Custom mode and multiple stabilisation options give more room to correct framing and adapt the same camera to different mounts.
Instead of asking which mount is universally best, decide what the viewer should feel. If they should see what you see, use the helmet. If they should feel how you ride, start with the chest. If the goal is a stable view of the route, put the camera on the bike.
That decision will affect the final video more than simply choosing the most expensive mount.