Bike Lights for Daytime Visibility and Night Riding: A Practical Guide to Safer Cycling
Cycling offers freedom, fitness, and a refreshing way to explore the world, but sharing the road with cars, vans, and other vehicles requires more than good handling skills. Visibility is one of the most important parts of cycling safety. Whether you commute through busy city streets, ride country lanes, or explore mountain trails, the right bike lights help other road users recognise your position while giving you a clearer view of the path ahead.
Many cyclists switch on their lights only after sunset. However, daytime visibility matters too, particularly in heavy traffic, overcast weather, shaded roads, and changing light conditions. Choosing suitable lighting means considering brightness, beam shape, battery life, mounting, and the type of riding you do. Brands such as RAVEMEN focus on these practical requirements with front lights, rear lights, and specialised beam designs for different cycling environments.
Understanding how to select and use bicycle lighting can help you make a more informed decision and build safer habits throughout the year.
Why Bicycle Lighting Matters Beyond Darkness
A bicycle light serves two distinct purposes: helping you see and helping others see you. These functions overlap, but they are not identical.
A powerful front light can illuminate potholes, road debris, and uneven surfaces. A daytime running light, meanwhile, is designed primarily to make a cyclist more noticeable to approaching traffic. A rear light communicates your presence to vehicles approaching from behind.
The difference matters because a light that illuminates a road effectively does not automatically make a cyclist conspicuous from every angle.
Research supports the value of visibility. A controlled experiment involving 3,845 cyclists in Odense, Denmark, found that participants using permanent bicycle running lights had a 19% lower incidence of reported personal-injury accidents than the control group. The researchers also reported a significant reduction in collisions involving multiple road users. These findings support the use of running lights, although they should not be interpreted as a guarantee against crashes.
For everyday riders, the lesson is straightforward: visibility should be part of your cycling routine, not an emergency response to darkness.
Understanding Daytime Running Lights and Their Benefits
Daytime running lights are designed to help cyclists stand out in ordinary daylight. They can be especially useful when sunlight changes rapidly, when vehicles approach from side streets, or when trees and buildings create alternating patches of light and shadow.
Well-designed daytime lights for bikes can provide a noticeable visual signal without requiring the cyclist to use a high-output night-riding beam throughout the day.
What Makes a Daytime Light Effective?
Several characteristics influence how easily other road users can recognise a bicycle.
- Flash pattern: A suitable daytime pulse or flash mode can attract attention against a visually busy background.
- Beam visibility: Light distribution affects how noticeable the cyclist is from different angles.
- Mounting position: A securely mounted light is less likely to move out of alignment during a ride.
- Battery endurance: Reliable runtime encourages riders to use their lights consistently.
- Weather resistance: Rain and road spray should not prevent essential lighting from working.
Brightness alone does not determine effectiveness. A carefully designed beam and a useful flash pattern can make a light more practical than a brighter model with an unsuitable distribution.
Cyclists comparing lighting options can explore RAVEMEN’s guidance on daytime lights for bikes to understand the factors involved in choosing a daytime setup.
When Should You Use Daytime Lights?
Consider running your lights during:
- Morning and evening commutes, when sunlight may be low or inconsistent.
- Overcast conditions, when a cyclist can blend into a grey road environment.
- Rides through tunnels, tree-covered roads, or areas with frequent shadows.
- Busy urban journeys with frequent junctions and turning vehicles.
- Longer rides that may continue beyond the expected daylight hours.
A consistent lighting routine is easier to maintain than switching lights on only when conditions appear dangerous.
Choosing the Right Brightness for Your Cycling Environment
Lumens measure the total visible light emitted by a source. They are useful when comparing bicycle lights, but they do not tell the entire story. Beam shape, optics, mounting height, and the direction of the light all influence what you can see and how other people perceive you.
A city commuter travelling on illuminated streets usually needs a different setup from a mountain biker navigating a technical descent.
Practical Brightness Guidelines
The following ranges offer a starting point rather than universal requirements. Actual needs depend on speed, terrain, ambient lighting, and local regulations.
| Riding environment | Approximate front-light output | Main priority |
| Well-lit urban streets | 200–500 lumens | Being noticed and seeing nearby hazards |
| Poorly lit roads | 500–1,000 lumens | Illuminating the road ahead |
| Fast rural rides | 800–1,500 lumens | Greater forward visibility |
| Technical mountain trails | 1,200+ lumens | Seeing obstacles at speed |
| Daytime urban riding | A suitable dedicated daytime mode | Standing out in traffic |
These figures are practical selection guides, not guarantees of performance. A well-designed beam can illuminate the road more effectively than a poorly focused light with a higher lumen rating.
Rear lights also deserve careful consideration. For urban cycling, a clearly visible rear light with an appropriate daytime or night-time mode can help approaching drivers recognise your position. On dark roads, visibility from behind and the sides becomes particularly important.
Comparing RAVEMEN Front-Light Options
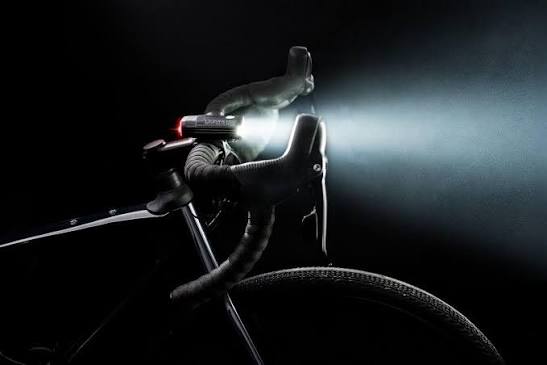
RAVEMEN offers several front lights designed for different riding demands. The FR1100 provides up to 1,100 lumens, while the FR1500 offers up to 1,500 lumens for riders who need greater output. The UR1700 reaches up to 1,700 lumens and features a cut-off beam design intended to reduce glare for oncoming road users.
These examples demonstrate why cyclists should compare more than headline brightness. A high-output light is useful when the road requires it, but the ability to control the beam and select an appropriate mode is equally important.
For someone who regularly changes between commuting and longer recreational rides, adjustable output can help balance visibility, battery consumption, and comfort.
Beam Pattern: See Clearly Without Blinding Others
A bicycle light should help you navigate safely without unnecessarily dazzling other road users. This is particularly important on shared roads, where cyclists, motorists, and pedestrians need to see one another clearly.
Cut-off beam designs direct light towards the road while limiting the amount projected upwards. They can be particularly useful for commuting on streets with oncoming traffic. More symmetrical beams may suit mountain biking, where riders need broader illumination to identify rocks, roots, and obstacles across a trail.
The correct choice depends on where you ride and how the light will be used.
How to Aim Your Front Light
Follow these practical steps when installing a new light:
- Secure the light firmly to the handlebar or designated mount.
- Position the beam so it illuminates the road ahead rather than shining directly into approaching faces.
- Test the beam while seated in your normal riding position.
- Check the alignment again after riding over bumps or rough surfaces.
- Select a lower or more controlled setting when sharing paths with pedestrians.
Avoid assuming that maximum brightness is always the safest option. A light that overwhelms another road user’s vision can create a hazard rather than prevent one.
Battery Life, Charging, and Weather Resistance
A bicycle light is only useful when it has enough power to work throughout the journey. Battery life therefore deserves as much attention as maximum brightness.
Manufacturers often advertise different runtimes for each mode. High-output settings usually consume more energy, while lower-output and flashing modes can extend operating time. Actual performance varies according to temperature, battery condition, and the selected light pattern.
USB-C charging is a convenient feature because it can simplify charging for riders who already use compatible cables and power adapters. However, charging speed and runtime still depend on the specific product.
Weather resistance is another practical consideration. Rain, moisture, dust, and road spray can challenge lights during regular commuting. Look for a clearly stated ingress-protection rating and follow the manufacturer’s charging and maintenance instructions.
For example, RAVEMEN highlights weather-resistant construction across its lighting range, with IPX6 protection among the product features identified in its brand information. Always check the exact model’s specifications rather than assuming that every product has the same rating.
A few habits can make your lighting setup more dependable:
- Recharge your lights before longer rides rather than waiting for a low-battery warning.
- Check battery indicators before leaving home.
- Inspect charging ports and seals according to the manufacturer’s instructions.
- Carry a charged backup light on long or remote journeys.
- Test both front and rear lights before setting off.
A small amount of preparation can prevent a frustrating situation several kilometres from home.
Rear Lights and Smart Features for Greater Awareness
Front lights help illuminate the road and make you visible from ahead. Rear lights provide a separate and essential signal to traffic approaching from behind. Using only a powerful front light leaves a major gap in your visibility setup.
Modern rear lights may include daytime warning flashes, multiple brightness modes, and smart features. RAVEMEN’s product range includes the TR600 rear light, which offers a warning flash mode, and the NT401 smart tail light, which supports customised light patterns through the RAVEMEN app. Its NT201 is presented as a smart radar tail light designed to support rearward awareness.
These functions serve different needs. A conventional rear light may be sufficient for a short urban commute, while riders who regularly travel on rural roads may value additional awareness features. Smart functions should complement, not replace, shoulder checks, appropriate signalling, and attentive riding.
Mounting also matters. A rear light must remain visible rather than being hidden by a bag, clothing, or the bicycle frame. Before riding, check that the light is secure and that its position suits your bike.
What Research Says About Cycling Visibility
Safety recommendations are stronger when they are considered alongside research rather than relying on assumptions about brightness or appearance.
The following findings provide useful context.
| Research or safety source | Key finding | Practical implication |
| Danish controlled experiment, 2013 | Permanent running lights were associated with a 19% lower incidence of reported personal-injury accidents | Consider using running lights consistently |
| US National Highway Traffic Safety Administration | In 2021, 56% of bicyclist fatalities occurred at dawn, dusk, or night | Treat low-light visibility as a serious safety priority |
| Danish daytime-light study, published in 2025 | A trial of 5,380 cyclists reported a corrected estimated 25% reduction in multi-party personal-injury accidents, but the result was statistically insignificant | Daytime lights are a sensible precaution, but the precise safety effect remains uncertain |
| Transport for London | Its cycling guidance notes that around 800 lumens can be appropriate for road riding at night, depending on beam design and conditions | Match output to the route, not just the highest available rating |
The evidence points towards a balanced approach: good lighting can improve visibility, but outcomes depend on the environment and other road users. No light can compensate for every hazard, poor infrastructure, or inattentive driving.
A Simple Lighting Checklist Before Every Ride
Building a quick inspection into your routine helps you avoid preventable problems. Before leaving, take a moment to check the following:
- Front light is charged, switched on when needed, and correctly aimed.
- Rear light is working and visible from behind.
- Both mounts are secure.
- The selected mode suits the surrounding light and traffic.
- Clothing or luggage does not block the lights.
- You have enough battery for the planned journey and possible delays.
- Reflective details are available for additional visibility in low light.
Remember that local laws vary. Check the lighting, reflector, and equipment requirements that apply where you ride, particularly when travelling across jurisdictions.
How to Build a Lighting Setup That Fits Your Needs
Rather than buying the brightest light available, start by examining your usual route. A commuter travelling on illuminated city streets may prioritise a compact front light, a visible rear light, and dependable battery life. Someone riding unlit country roads may need stronger forward illumination, a carefully controlled beam, and a backup light.
Mountain bikers have different priorities again. Their lights must illuminate the trail at a distance that matches their speed, while secure mounting and sufficient runtime matter on rough terrain.
RAVEMEN provides options across these use cases, including front lights with different output levels, specialised beam patterns, and rear lights with smart features. Reviewing model specifications alongside your actual riding conditions is a more reliable way to choose than relying on a single headline number.
For further comparison, riders can read RAVEMEN’s guide to good bike lights for night riding. Use the guidance to compare beam design, output, runtime, and mounting requirements before choosing a light for your bicycle.
The best setup is one you can use consistently, maintain easily, and adapt to the conditions you encounter.
Make Visibility Part of Every Ride
Good bicycle lighting is not simply an accessory for winter evenings. It is a practical part of a safer cycling routine that helps riders see hazards, communicate their position, and remain more noticeable as conditions change. The right combination of front and rear lights, thoughtful beam alignment, reliable charging, and regular checks can make everyday commuting and longer rides better prepared for the unexpected.
RAVEMEN’s range provides options for cyclists who want to compare output, beam control, mounting, and smart lighting features according to their needs. Take time to assess your routes and choose equipment that suits your real riding conditions.
Is your current bike lighting setup ready for the next commute, an unexpected change in weather, or a ride that continues after sunset?
Frequently Asked Questions
Are daytime running lights useful if I only cycle in the city?
Yes. Daytime lights can help make you more noticeable around junctions, parked vehicles, and busy streets. They are particularly useful when lighting conditions change quickly, although they cannot guarantee that other road users will see you.
How many lumens do I need for night riding?
For illuminated streets, a front light in the approximate 200–500-lumen range may be adequate. Poorly lit roads and faster riding often require more output, while technical trails may need 1,200 lumens or more. Beam quality and correct aiming remain essential.
Should I use a front light and a rear light together?
Yes. They serve different purposes. A front light helps you see and be seen from ahead, while a rear light makes your position clearer to traffic approaching from behind. Reflectors and suitable clothing can add further visibility.
Are RAVEMEN bike lights suitable for different cycling styles?
RAVEMEN offers models for commuting, road cycling, and other riding situations, with differences in brightness, beam pattern, and rear-light features. Compare the specifications of individual models with your route, speed, and expected riding conditions before purchasing.
How can I make my bike lights last longer during a ride?
Choose a mode appropriate to the conditions, charge your lights before departure, check battery indicators, and carry a backup for longer trips. Avoid relying on the advertised maximum runtime without checking which brightness setting it refers to.