
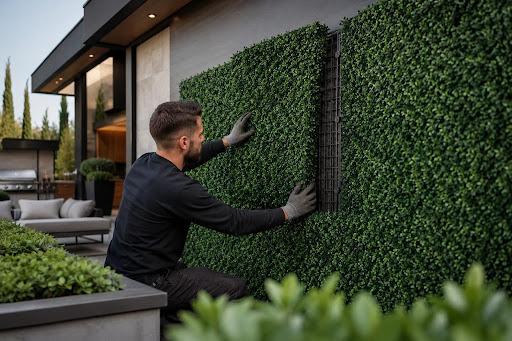
Artificial Hedge Wall Installation for a Flawless 2026 Look
Installing a quality hedge on your wall requires detailed planning. You’ll need to map the space, link panels and secure them to the surface safely and evenly. In theory, it sounds like a simple task. But as you dig deeper, you may get caught out by tricky corner angles or uneven surfaces.
No matter what kind of hedge you get, keep in mind that this is a DIY project, so you’ll need to plan everything. You’ll also need certain tools and bits in the process, so get everything ready in the working area before you even start.
This being said, let’s take a look at how to install artificial hedge on wall to transform your space into a lush, green oasis.
- What Tools You’ll Need
You could get an artificial premium hedge that comes with all the required materials and tools in the package. But this isn’t a general rule. Check everything you’ll get for your money upfront. If the hedge comes by itself, you’ll need to get the required tools separately.
Here’s a list of what you’ll need.
- As many hedge wall panels as needed to cover the entire wall
- Thick and solid cable ties or zip ties
- Drill and the right masonry or maybe wood drill bits
- Wall plugs or anchors
- Screws with washers of the same size
- Measuring tape
- A pencil or chalk
- Heavy-duty scissors
- Measure Twice
Measure the wall, its height and width. Calculate the square area and divide by the square area of each panel. This way, you’ll know precisely how many panels you’ll need. You may get lucky and fit the right number of panels, without leaving any empty spaces.
On the other hand, you may also have to cut some panels to fit everything especially if you are working around light switches, power outlets, or wall sconces.
Once you get the panels, lay everything out on the floor. Create the design at a glance, so you’ll get the right shape and size before making any permanent changes to your walls. If they’re facing down, keep in mind that the direction is opposite. So, what’s on your left side will actually go on the right side once it’s on the wall.
You can also place them face up, just to avoid confusion.
- Connect Panels
Once everything is assembled on the floor, it’s time to connect the panels. Get all the snaps and clips to click on everywhere.
Now, when learning how to install an artificial hedge on a wall, you have two options.
- You can do it panel by panel, which takes a bit of time. There’s also more room for potential mistakes with misalignment or wrong calculations.
- You can also get more panels together on the floor, then secure them at once. If you have a friend to help out and hold the panel, you can even do the whole wall in one go, depending on how large and heavy it is.
- Mark and Drill
Whether you assemble more panels or you do one at a time, hold the grid up against the wall and mark the corners and center with a pencil or chalk. Make sure that it’s perfectly aligned though.
If you install your artificial hedge on masonry, concrete or brick, you can also use a hammer drill and make some holes straight away. It’s up to you if you drill through the panels or based on your markings.
The holes should be similar to the size of your screws, not bigger. Once the holes are in, tap the wall plugs into them. Use a hammer and make sure that they sit flush with the wall. Too much out or in could be an issue with the installation and interlocking elements of your panels causing the grid to warp or buckle when tightened.
- Secure Your Wall
Get the screws through the plastic grid and right into your wall plugs. The washer must be large enough to accommodate the plastic mesh.
Now, it depends on where your artificial hedge goes.
Most people go for the outdoor variety. However, artificial walls aren’t messy and don’t require much maintenance, so you can also get an indoor accent wall to bring a refreshing touch of nature into your living room or office
All in all, when it comes to the outdoors, you may need some solid anchor points to ensure your hedge can resist strong winds and heavy rainstorms without tearing away from the building.
Since anchor strength varies by wall material, installation depth and expected load, review this concrete and masonry anchor guide before choosing fasteners for an outdoor hedge wall.
- Trim, Fluff and Finish
Once everything is secure and in place, it’s time to trim off all the excess overhang. Pay attention to the edges making sure they line up perfectly with the borders of your wall for a clean, professional appearance.
You can also brush or ruffle the foliage to make it look fluffy. Plus, you’ll need to hide all the technical parts of it, such as screw heads or the grid.
You can also enhance your hedge with extra flowers and a bit of color, depending on what kind of effect you want to achieve.
Bottom line, learning how to install artificial hedge on wall isn’t as difficult as it may seem, but it’s not always a straightforward process either. What type of wall you have or what kind of hedge you get may also imply some small changes to these steps so take your time and enjoy the creative process.