
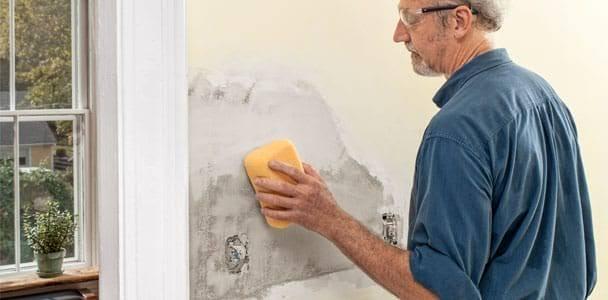
Plaster Repair for Wall Damage Caused by Removing Shelves, Fixtures, and Built-In Features
Removing shelves, cabinets, mirrors, decorative panels, and other mounted features can reveal wall damage that remained hidden for years. Fastener holes, adhesive marks, chipped edges, and shallow depressions often become visible only after an installation is taken down. On plaster walls, these seemingly minor defects deserve careful attention because the surrounding material may react differently from newer wall surfaces.
Plaster repair after fixture removal involves more than filling every visible hole and applying fresh paint. Homeowners should first determine whether the exposed area is stable, whether previous installation methods damaged surrounding material, and how the repaired section will blend with the rest of the wall. These observations can help prevent a small project from producing an uneven finish.
The condition of the exposed surface can vary considerably depending on what was removed and how long it remained attached. Loft Home Services can assess localized wall damage and determine which areas need preparation before finishing begins. A measured approach allows homeowners to update a room without leaving obvious outlines from features that are no longer there.
Understand What Fixture Removal Can Reveal
Wall-mounted items often conceal more than their attachment points. Once they are removed, homeowners may discover old paint lines, previous patches, adhesive residue, discoloration, or damaged surface material around the former installation.
Heavy fixtures can create deeper holes where anchors or screws were installed. Older mounting methods may also leave irregular openings that require more preparation than modern fastener holes.
The surrounding plaster should be examined before cosmetic work begins. Loose edges or crumbling material can affect the quality of a new patch if they are simply covered.
Remove Remaining Hardware Without Enlarging Damage
Old screws, anchors, hooks, and mounting brackets should be handled carefully. Pulling hardware aggressively can break material around an existing opening and turn a small repair into a much larger one.
The appropriate removal method depends on the type of fastener and how securely it is embedded. Homeowners should avoid unnecessary force when resistance suggests that surrounding plaster could be disturbed.
Once hardware is removed, the opening can be inspected more clearly. This makes it easier to determine whether the damage is limited to the fastener location or extends into nearby material.
Evaluate the Stability Around Fastener Holes
A hole may appear small while the material around it has become loose. Tapping, drilling, repeated adjustments, or years of weight from a mounted object can sometimes weaken the immediate area.
Loft Home Services can evaluate damaged sections before Plaster repair proceeds. Establishing a stable working area is important because filling an opening without addressing loose surrounding material can produce a patch that looks acceptable initially but performs poorly later.
Homeowners should also watch for cracking that extends beyond the original mounting point. Those lines may indicate that removal exposed a broader condition requiring separate attention.
Address Adhesive Residue With Appropriate Care
Some mirrors, panels, trim pieces, and decorative elements are installed with adhesive instead of mechanical fasteners. Removing them can leave hardened material attached to the wall or pull away portions of the finished surface.
Avoid Aggressive Scraping on Fragile Areas
Heavy scraping can gouge plaster or remove sound material surrounding the adhesive. The objective should be controlled preparation rather than forcing every residue spot away as quickly as possible.
The exposed surface should remain sufficiently stable for later finishing. If adhesive has bonded strongly to a fragile area, additional evaluation may be preferable to creating unnecessary damage through aggressive removal.
Look for Hidden Damage Behind Built-In Features
Built-in shelving and cabinets can cover substantial sections of wall for decades. Removing them may expose old holes, unfinished areas, abandoned mounting points, or patches completed during earlier renovations.
Differences in paint color are also common because covered areas have not experienced the same sunlight, cleaning, or repainting as exposed surfaces. These visual differences should not automatically be mistaken for structural damage.
Homeowners should inspect the entire newly exposed area rather than concentrating only on obvious holes. Doing so creates a clearer picture of what preparation is required before decorating begins.
Treat Chipped Edges Before Cosmetic Finishing
Plaster can chip around holes when screws or anchors are removed. These broken edges may create shallow depressions that remain visible even after the central opening is filled.
A successful repair should account for the shape of the damaged area. Simply filling the deepest point may leave irregular edges that become noticeable under paint.
Careful surface preparation helps create a gradual transition between repaired and existing material. That transition is particularly important in rooms where light travels sideways across the wall.
Consider the Finish Surrounding the Former Fixture
A repaired section must eventually relate to the wall around it. Existing surfaces may be smooth, subtly textured, or shaped by multiple coats of paint applied over many years.
Matching the surrounding appearance requires observation before final finishing begins. A patch that is much smoother than an older wall can be just as noticeable as one that is too rough.
The former fixture may also have left a visible outline. Surface preparation and painting should consider the larger exposed area rather than treating individual fastener holes as completely separate concerns.
Allow Repairs to Progress Before Repainting
Homeowners often want to repaint immediately after removing an unwanted shelf or fixture. Moving too quickly can make it harder to correct uneven patches or other imperfections discovered during preparation.
Repair materials need appropriate time to set before subsequent finishing steps. Product instructions should guide drying and application times rather than assumptions based solely on surface appearance.
Plaster repair should be completed and evaluated before the decorative coating becomes the focus. This sequence gives homeowners an opportunity to identify ridges, depressions, or transitions while adjustments remain practical.
Plan Carefully Before Installing Replacement Features
Sometimes a removed fixture will be replaced by another shelf, cabinet, mirror, or decorative element. Homeowners may be tempted to ignore damaged areas that the new installation is expected to cover.
Repairing necessary damage beforehand can provide a cleaner foundation for the next project. It also prevents hidden deterioration from being forgotten simply because another object conceals the location.
New mounting points should be planned according to the fixture and wall conditions. Reusing a damaged opening without considering its condition may create another problem rather than simplifying installation.
Restore the Wall Without Erasing Its Existing Character
Older plaster walls often contain subtle variations that developed through previous finishing and maintenance. Localized repairs do not necessarily require making an entire wall appear newly manufactured.
Loft Home Services can approach damaged sections with the surrounding finish in mind. The objective is to address deterioration while allowing repaired areas to relate naturally to serviceable material nearby.
A restrained approach can be especially useful when only a few fixtures have been removed. Preserving sound surrounding surfaces reduces unnecessary disturbance while still improving the appearance of exposed areas.
Give Newly Exposed Walls a Complete Finished Appearance
Removing shelves, cabinets, mirrors, or built-in features can transform a room, but the project is not finished until the wall behind them receives appropriate attention. Old mounting holes, adhesive residue, chipped edges, and hidden patches can remain noticeable long after the fixture itself is gone.
Thoughtful Plaster repair begins with inspection and stable preparation rather than immediate painting. Homeowners can improve the final appearance by removing hardware carefully, evaluating surrounding material, addressing damaged edges, and considering how new work will blend with established finishes.
Previously covered walls often reveal a history of earlier installations and decorating decisions. Those marks do not necessarily require extensive replacement, but they should be assessed rather than concealed hastily. Careful repair allows the updated room to feel intentional while preserving sound wall material that still performs well.