7 Tips for Troubleshooting Your Power Tools at Home
Navigating the mechanical hiccups that accompany a home improvement is a skill that every dedicated DIY enthusiast should strive to master. While it is tempting to assume that a non-responsive drill has many common faults, they are easy to analyse and fix with basic tools. This article outlines strategies for identifying and resolving the frequent equipment failures right in your own garage or workshop.
1. Check the Power Source First
Before diving into the disassembly of any internal components, make sure that the energy in your device is stable and sufficient for what you are going to do. If it’s a cordless model, check that the battery is firmly clicked into place and charged. For corded equipment, check the entire lead for any hidden kinks or cuts, as well as exposed wire that could be completing an intermittent electrical connection in use.
2. Clean the Motor Vents Regularly
Gently brush out the ventilation slots, or use a canister of compressed air if you have one handy. The motor will just slow down or activate a safety thermal cut-out if the cooling system fails to avoid melting the permanent magnets once hot enough. The top-end performance and dependability you expect from tackling the toughest timber or masonry can best be maintained by keeping these pathways clear.
3. Inspect the Carbon Brushes for Wear
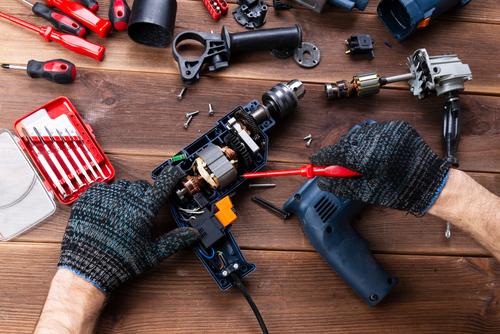
One of the reasons for a motor that stutters is the natural erosion of the carbon brushes that sit against the spinning commutator. Access these small blocks by unscrewing two plastic caps on the side of the motor housing, allowing you to see if they have worn down. If the brushes are uneven, the electrical flow becomes unstable, and the tool will lose a significant amount of its original torque.
4. Verify the Condition of the Trigger
You should feel for any crunchiness or resistance when you pull the trigger, as this indicates that fine particles have made their way into the housing and are obstructing the movement. Using a quick-drying contact cleaner spray can dissolve the grime and restore the crisp response needed for precise control. A reliable switch is essential for the accuracy of your work and your safety while operating machinery.
5. Look for Internal Wire Disconnections
Heavy vibration from constant use can cause the internal wiring to loosen from the terminals. If your tool only works when the cable is held at a specific angle, you have a loose connection that requires a simple re-soldering or a new terminal crimp. Opening the handle casing allows you to inspect the integrity of the joins and ensure that no wires are pinched or rubbing against moving mechanical parts.
6. Test the Capacitor for Faults
A small component called a capacitor helps the motor start up by providing an initial burst of electrical energy. If you hear a low humming sound when you pull the trigger, but the blade or bit fails to spin, the capacitor may have leaked or failed due to age. You can often spot a faulty capacitor by looking for signs of bulging or discolouration on its outer casing once you have opened the protective motor cover.
7. Sharpen or Replace the Attachments
Sometimes the problem with a power tool is not the motor, but rather the blunt accessory that is trying to force its way through a material. A dull drill bit creates friction, which puts an unfair amount of strain on the engine and can make the tool feel underpowered. So, troubleshooting for RYOBI power tools means you are using the correct type of blade for the density of the timber or metal you are working on.
Helpful Strategies for Tool Troubleshooting
Developing a systematic approach to equipment repair ensures that you can handle unexpected delays with a calm and logical mindset. Regular cleaning and minor adjustments are the best defence against the major mechanical breakdowns that can derail your creative flow. Keeping your tools in top condition protects your investment and enhances the quality of every task you perform around the home.