
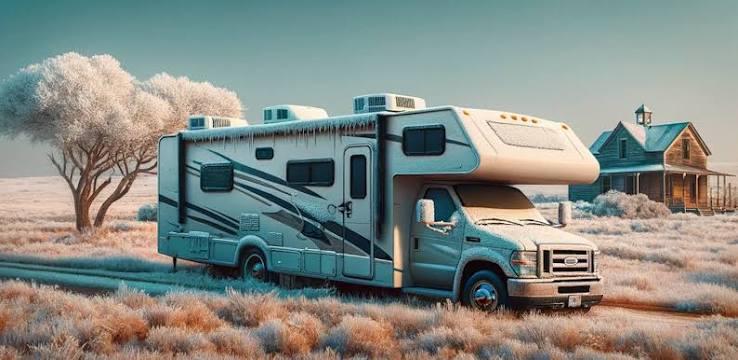
RV Service Tips Every Owner Should Know Before Winter
Why Pre-Winter Service Matters
When the camping season winds down, it’s tempting to park the RV, lock the door, and forget about it until spring. Unfortunately, winter is one of the hardest seasons on a recreational vehicle. Freezing temperatures can crack water lines, moisture can lead to mold and rot, batteries can drain and fail, and rodents can move in looking for warmth. A few hours of preparation now can prevent hundreds or even thousands of dollars in repairs later.
Whether you store your RV for the season or plan to keep traveling in cold weather, these RV winter service tips will help you protect your investment. We’ll walk through the most important systems to check, from plumbing and roofing to batteries, tires, and engines, and explain when it makes sense to handle a task yourself and when to call a professional. Always follow your owner’s manual and the manufacturer’s recommendations for your specific rig.
Winterize the Plumbing System First
Frozen water lines are one of the most common and expensive winter RV problems. When water freezes, it expands, which can split pipes, crack fittings, and damage the water heater, pump, and faucets. Winterizing your plumbing should be at the top of your list.
The basic winterizing process typically includes these steps:
- Drain and flush the black and gray holding tanks at an approved dump station.
- Drain the fresh water tank and open the low point drains.
- Turn off and drain the water heater after it has cooled. Never drain it while hot or under pressure.
- Bypass the water heater so you don’t waste antifreeze filling it.
- Either blow out the lines with compressed air at low pressure or pump RV antifreeze through the system.
- Open each faucet, hot and cold, until pink antifreeze flows, including the shower, toilet, and outdoor shower.
- Pour a small amount of antifreeze into each drain to protect the P-traps.
Keep a few important points in mind:
- Use the right antifreeze: Only use nontoxic RV and marine antifreeze made for potable water systems. Never use automotive antifreeze.
- Don’t forget accessories: Ice makers, washing machines, dishwashers, and water filters often need their own winterizing steps.
- Remove filters: Take out water filter cartridges before adding antifreeze.
- Label your work: A note on the door reminding you the system is winterized helps avoid surprises in spring.
If you plan to camp in freezing temperatures instead of storing your RV, focus on heated tank pads, heat tape on exposed lines, skirting, and keeping the furnace running to protect plumbing bays.
Inspect the Roof, Seals, and Exterior
Water intrusion is the silent enemy of every RV. Snow and ice sitting on the roof for weeks can find even the smallest gap, and the damage often goes unnoticed until walls soften or floors start to rot. A careful exterior inspection before winter is one of the smartest RV winter service tips you can follow.
Focus on these areas:
- Roof membrane: Look for cracks, tears, bubbles, or soft spots on rubber, TPO, or fiberglass roofs.
- Sealant around fixtures: Check the caulking around vents, skylights, antennas, air conditioners, and the roof edges. Reseal any cracked or peeling areas with a sealant compatible with your roof material.
- Windows and doors: Inspect seals and weatherstripping for gaps or brittleness.
- Slide-out seals: Clean and condition rubber seals so they stay flexible in cold weather.
- Exterior seams and trim: Check corner moldings, end caps, and storage bay doors for loose fasteners or gaps.
- Awnings: Clean and fully dry fabric awnings before rolling them up, then keep them retracted during storage.
Give the exterior a thorough wash and, if possible, a coat of wax or protectant. Removing dirt, sap, and road grime before storage helps prevent stains and oxidation over the winter months.
Protect Your Batteries and Electrical System
Cold weather is hard on batteries, and a battery left discharged over winter can freeze and fail. Parasitic draws from devices like propane detectors, clocks, and stereos can slowly drain a battery even when the RV is parked.
To keep your electrical system healthy:
- Fully charge batteries before storage: A charged battery resists freezing far better than a discharged one.
- Disconnect or use a battery cutoff switch: This stops parasitic draws while the RV sits.
- Remove batteries if storing in extreme cold: Store them somewhere cool, dry, and above freezing, and keep them on a maintainer or charge them periodically.
- Check lead-acid batteries: Inspect water levels and top off with distilled water as needed. Clean corrosion from terminals.
- Follow lithium guidelines: Lithium batteries often have specific storage and charging temperature limits, so check the manufacturer’s instructions.
- Inspect wiring and connections: Look for loose, corroded, or chewed wires, especially near the battery compartment and converter.
- Test safety devices: Confirm smoke, carbon monoxide, and propane detectors work, and replace batteries as needed.
If your RV has solar panels, clean them and make sure the charge controller is set correctly for storage. Solar can help keep batteries topped off, but it may not fully offset parasitic loads on short winter days.
Check Tires, Brakes, and the Chassis
Tires and running gear often get overlooked during winter prep, but months of sitting in one spot can cause flat spots, dry rot, and corrosion. Taking care of these components now keeps you safe when it’s time to hit the road again.
- Inflate tires to the recommended pressure: Cold temperatures lower tire pressure, so check and adjust before storage.
- Inspect for damage and age: Look for cracks, bulges, and uneven wear, and check the date code. RV tires often age out before the tread wears down.
- Protect from sunlight: Use tire covers to block UV rays that can degrade rubber over time.
- Get tires off the ground if possible: Parking on boards or tire pads helps prevent moisture damage and flat spots, especially on concrete or dirt.
- Inspect brakes and bearings: Fall is a good time to have wheel bearings repacked and brakes checked if they’re due for service.
- Lubricate moving parts: Grease stabilizer jacks, landing gear, slide mechanisms, and door hinges to prevent rust and sticking.
- Check the hitch: Inspect couplers, pin boxes, and safety chains for wear or corrosion.
If you’ll be storing your RV for several months, moving it a few feet periodically can help reduce flat spotting on the tires.
Care for the Engine, Generator, and Propane System
Motorhome owners have extra systems to protect, and towable owners with generators or propane appliances shouldn’t skip this section either. Fuel, fluids, and gas lines all need attention before cold weather sets in.
Engine care for motorhomes:
- Change the oil and filter before storage so used oil and its contaminants don’t sit in the engine all winter.
- Check coolant and make sure it’s rated for the lowest temperatures you expect.
- Fill the fuel tank and add a fuel stabilizer to reduce condensation and fuel breakdown.
- Inspect belts, hoses, and wiper blades for cracks or wear.
- Top off windshield washer fluid with a winter formula.
Generator care:
- Add fuel stabilizer and run the generator long enough to circulate it through the system.
- Follow the manufacturer’s guidance on exercising the generator during storage, which often means running it under load periodically.
- Change the oil and check the air filter if service is due.
Propane system care:
- Turn off propane tanks at the valve during storage.
- Inspect hoses, regulators, and connections for cracks or leaks.
- Have a professional leak test performed if it’s been a while, especially before using the furnace for winter camping.
Keeping fuel stable and fluids fresh makes spring startup much smoother and reduces the risk of costly repairs.
Prepare the Interior and Keep Pests Out
A closed-up RV can become a magnet for moisture and unwanted guests. Mice, insects, and mold can do serious damage over a few months, so take time to prep the inside before you lock up.
Pest prevention:
- Remove all food, including canned goods that could freeze and burst.
- Clean thoroughly, wiping crumbs from cabinets, drawers, and under cushions.
- Seal gaps around plumbing, wiring, and underbelly openings with steel wool, foam, or mesh.
- Cover exterior vents and the furnace and water heater openings with screens designed for RVs, and remember to remove any covers before using those appliances.
- Use traps or deterrents according to your preference, and check them during storage.
Moisture control:
- Leave cabinet doors and the refrigerator slightly open to allow airflow and prevent odors.
- Place moisture absorbers or use a dehumidifier if you have power available.
- Crack a roof vent slightly if it has a rain-proof cover.
- Remove or prop up mattresses and cushions to allow air circulation.
Final interior steps:
- Close blinds to reduce sun damage to upholstery and flooring.
- Unplug appliances and electronics.
- Take home valuables, important documents, and anything that could be damaged by cold.
These small steps make a big difference when you open the door in spring and find a clean, dry, odor-free interior.
Choose Smart Storage and Know When to Call a Pro
Where and how you store your RV plays a big role in how well it survives the winter. The best option depends on your budget, climate, and available space.
Storage options to consider:
- Indoor storage: Offers the best protection from snow, ice, sun, and temperature swings, but usually costs the most.
- Covered storage: A roof overhead protects against snow load and UV damage at a lower price than fully enclosed storage.
- Outdoor storage: The most affordable option. Use a breathable RV cover made for your rig and choose a level, well-drained spot.
If you store outdoors, avoid parking under trees where falling branches and sap can cause damage, and check on the RV periodically, especially after heavy snow or wind.
When to call a professional:
Many winter prep tasks are DIY friendly, but some are best left to experts. Consider scheduling professional service if you:
- Aren’t confident in winterizing complex plumbing, washers, or ice makers
- Notice soft spots, stains, or other signs of water damage
- Need wheel bearings repacked or brakes adjusted
- Want a propane leak test or appliance inspection
- Plan to use your RV for winter camping and need cold-weather upgrades
Book early. Service centers often get busy in the fall as owners rush to winterize before the first hard freeze. Scheduling ahead is one of the simplest RV winter service tips, and it can save you from waiting weeks during peak season.
Frequently Asked Questions
When should I winterize my RV?
Winterize before the first hard freeze in your area. Many owners do it in early to mid-fall to stay ahead of unexpected cold snaps.
How much RV antifreeze do I need?
Most RVs need about two to three gallons when using the water heater bypass, though larger rigs or those with extra fixtures may need more.
Can I use regular antifreeze in my RV plumbing?
No. Only use nontoxic RV and marine antifreeze designed for potable water systems.
Should I remove my RV batteries for winter?
It’s a good idea in very cold climates. Store them in a cool, dry, above-freezing location and keep them charged.
Do I need an RV cover for winter storage?
If you store outdoors, a breathable cover made for RVs helps protect against UV, dirt, and moisture. Avoid plastic tarps that trap moisture.
How often should I check on my stored RV?
Check it every few weeks if possible, especially after storms, to look for leaks, pests, and battery issues.
Can I live in my RV during winter?
Yes, with preparation. Use skirting, heated tank pads, heat tape, extra insulation, and a reliable heat source, and keep propane levels topped off.
Final Thoughts: A Little Prep Now Pays Off in Spring
Winter doesn’t have to be hard on your RV. By winterizing the plumbing, sealing the roof and exterior, caring for batteries and tires, protecting the engine and generator, and keeping pests and moisture out, you set yourself up for a smooth start to next season.
Use these RV winter service tips as a checklist each fall, and don’t hesitate to call a qualified technician for tasks outside your comfort zone. A few hours of preventive care today can save you from costly repairs tomorrow and have your RV ready for adventure the moment the weather warms up.