
The Ultimate Guide to Helix Piercing: Pain, Cost & Aftercare
The Ultimate Guide to Helix Piercing: Pain, Cost & Aftercare
What to Know Before Getting a Helix Piercing
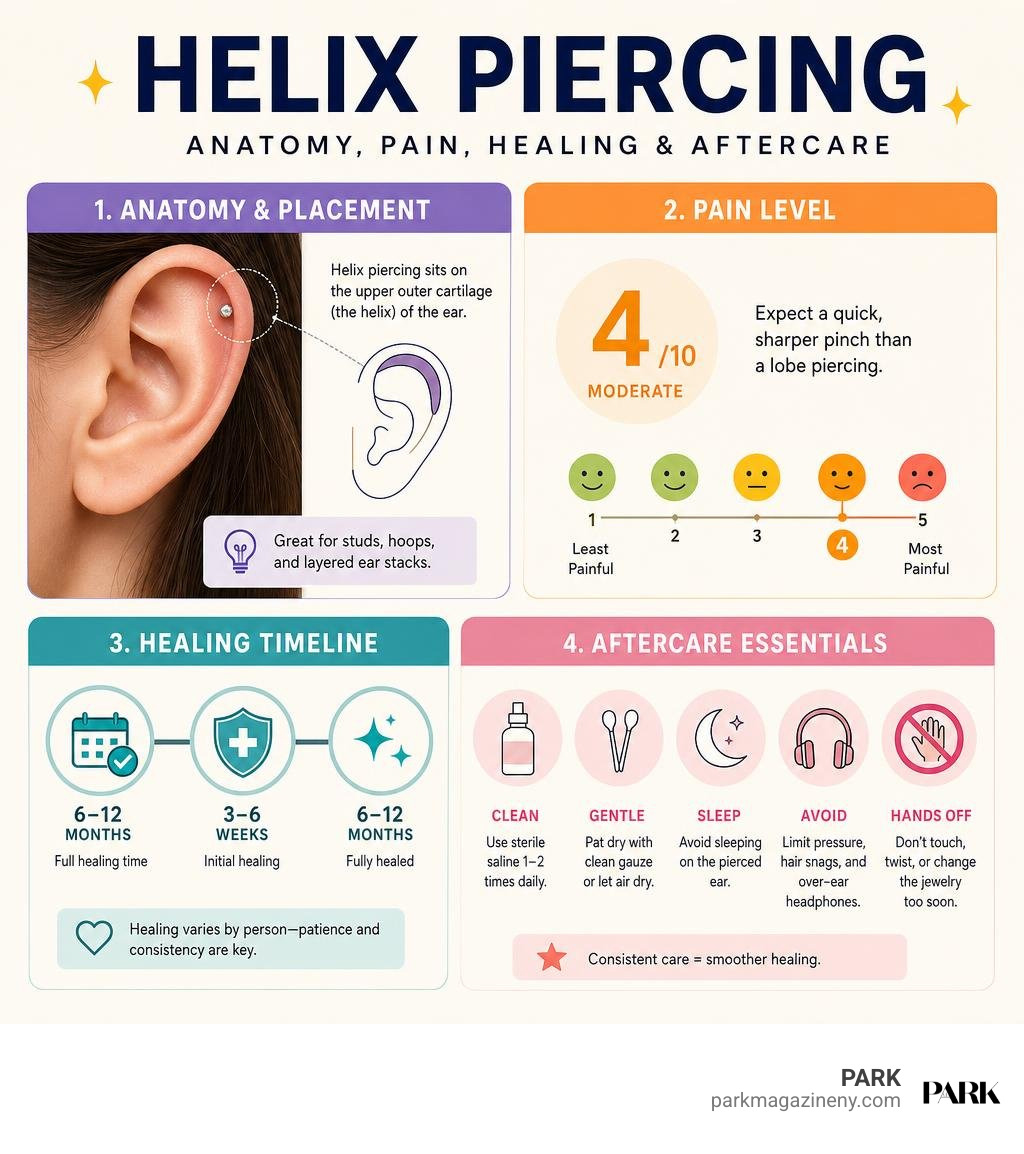
A helix piercing sits in the upper outer cartilage of the ear. It is a versatile choice for a minimal stud, a future hoop, or a layered ear stack. Expect a quick, sharper pinch than a lobe piercing, then plan for 6 to 12 months of full healing. The safest route is a reputable professional who uses a sterile, single-use hollow needle and implant-grade titanium or solid gold starter jewelry.
The style payoff can be excellent, but cartilage asks for patience. You will need to clean it with sterile saline, avoid sleeping on that ear, and leave the jewelry alone while it heals. Pressure, hair snags, over-ear headphones, and changing jewelry too soon are common causes of stubborn irritation bumps.
This guide covers the placement options, realistic pain and cost expectations, proper aftercare, and the jewelry choices that make a helix piercing easier to live with long term. I am W.A. Muller, and I will help you make a well-informed choice before you commit.
Must-know ** helix piercing** terms:
Understanding the Helix Piercing: Anatomy, Types and Placement
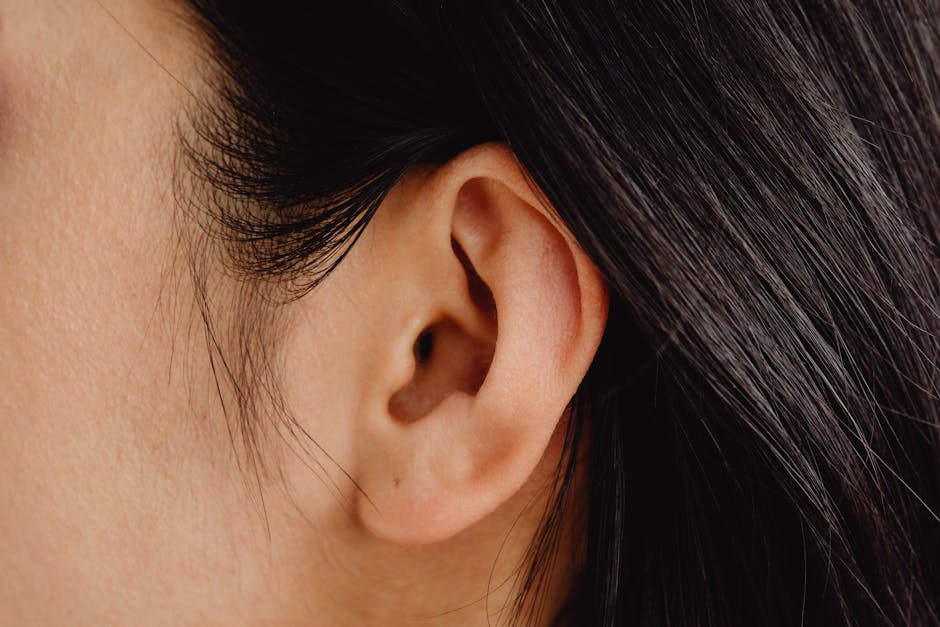
A helix piercing involves perforating the curled outer rim of cartilage on the upper portion of the ear. When we explore high-end ear curation, cartilage modification serves as the foundational anchor for building sophisticated looks. Incorporating a well-placed piece of fine jewelry into your ear curation is often the secret to looking expensive without the price tag, elevating a simple wardrobe through intentional, polished accents.
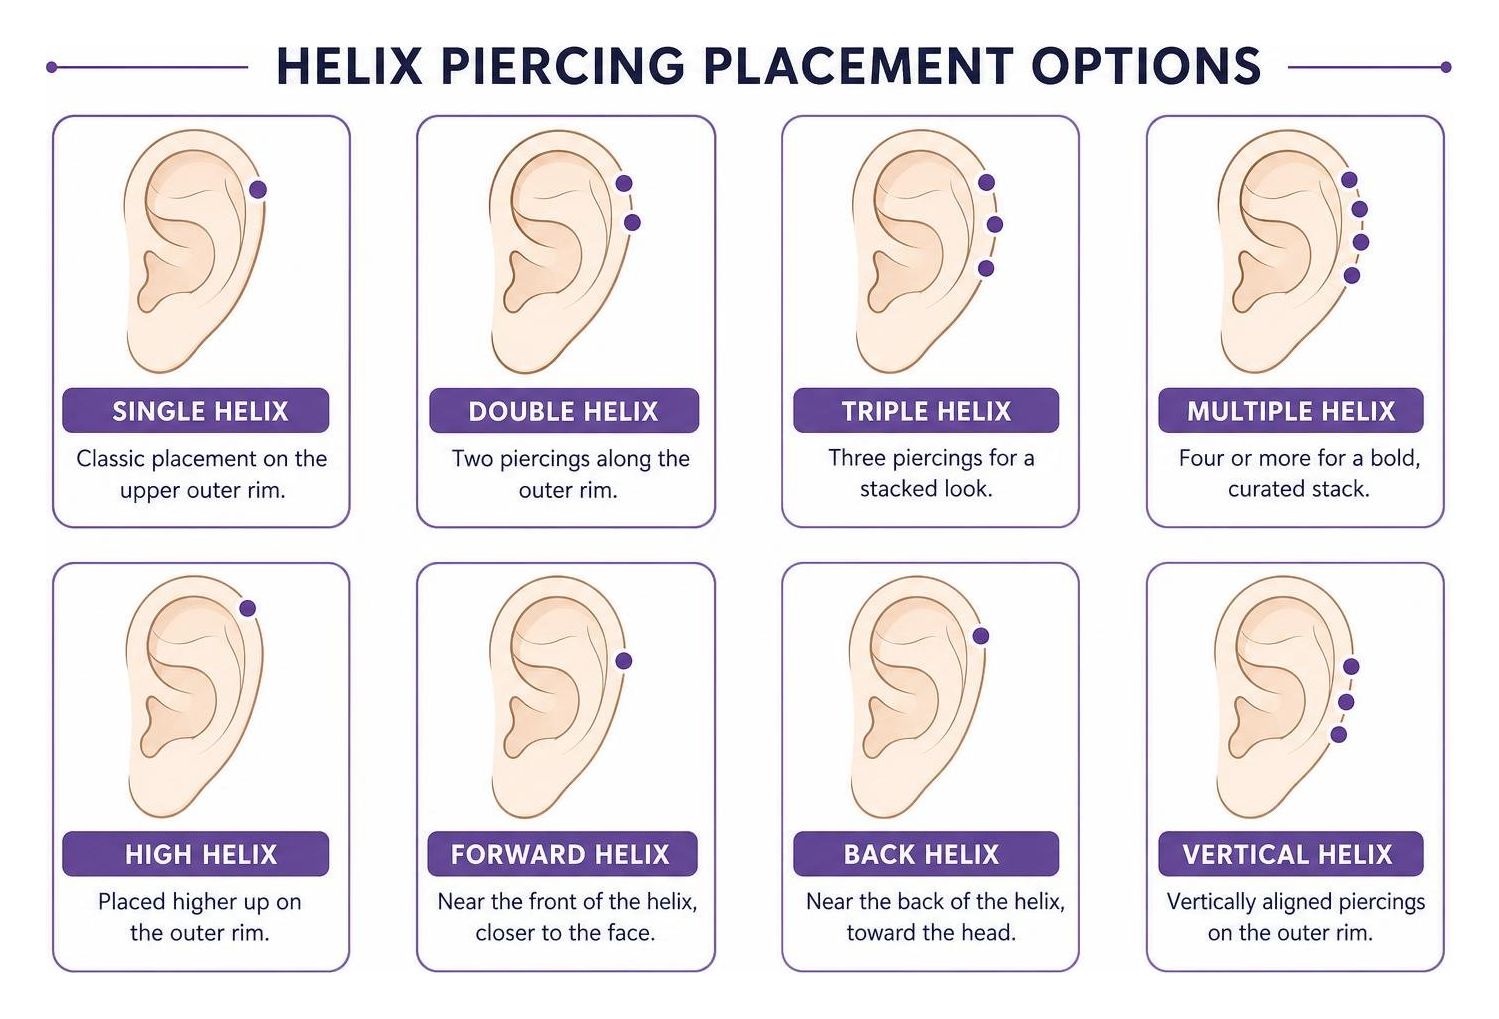
Types of Helix Piercing Placements and Styles
Not all helix piercings sit in the exact same spot. Your individual anatomy dictates what is safe and aesthetically flattering:
- Single Helix: The classic placement through the upper outer rim. As outlined in TheHelixHive.com, this remains a versatile foundational cartilage piercing.
- Double & Triple Helix: Two or three perforations vertically stacked along the outer cartilage curve.
- Forward Helix: Located at the front edge of the ear rim closest to the face, directly above the tragus.
- Mid-Helix (Low Helix): Positioned midway down the outer rim, right between a standard lobe and the upper cartilage curl.
- Hidden Helix: Placed underneath the deep overhang of the upper cartilage rim, allowing dangling charms or gem drops to appear as if floating out from the ear fold.
- Floating Helix: Engineered with flat-profile hardware where the mounting remains concealed behind the ear fold.
- Industrial Piercing: A structural modification where a single straight barbell connects two separate helix piercings across the upper cartilage scaffold.
The Difference Between Cartilage and Earlobe Tissue
Earlobes consist of soft, fleshy, highly vascularized adipose tissue. When a needle passes through a lobe, the rich blood flow delivers a steady stream of oxygen and healing nutrients, completing recovery within 6 to 8 weeks.
Cartilage is entirely different. It is an avascular, semi-rigid connective tissue lacking direct blood vessels. Healing nutrients must slowly diffuse into the piercing site from the surrounding perichondrium membrane. This unique biology explains why cartilage heals from the outside edge inward and requires anywhere from 6 to 12 months for full tissue stability.
Pain Level, Needle Safety and What to Expect
The thought of puncturing cartilage makes many people nervous, but understanding the physical mechanics helps demystify the experience. In cultural hubs like New York City, where body art seamlessly merges with high fashion, precision piercing standards reflect the evolution of fine jewelry in New York’s social circuit.
The Cartilage Pain Scale: What It Actually Feels Like
On a standard pain scale of 1 to 10, a professional needle helix piercing typically rates at a 4/10.
The initial puncture feels like a sharp, intense pinch lasting less than a second, sometimes accompanied by an audible “crunch” as the needle passes through dense structural tissue. This sound is completely normal tissue displacement. Within seconds, the sharp sting subsides into a warm, dull, throbbing sensation that generally fades over the first 2 to 4 hours.
Hollow Needles vs. Piercing Guns: The Cartilage Shattering Risk
We cannot stress this enough: never let anyone pierce your ear cartilage with a piercing gun or mechanical spring-loaded device.
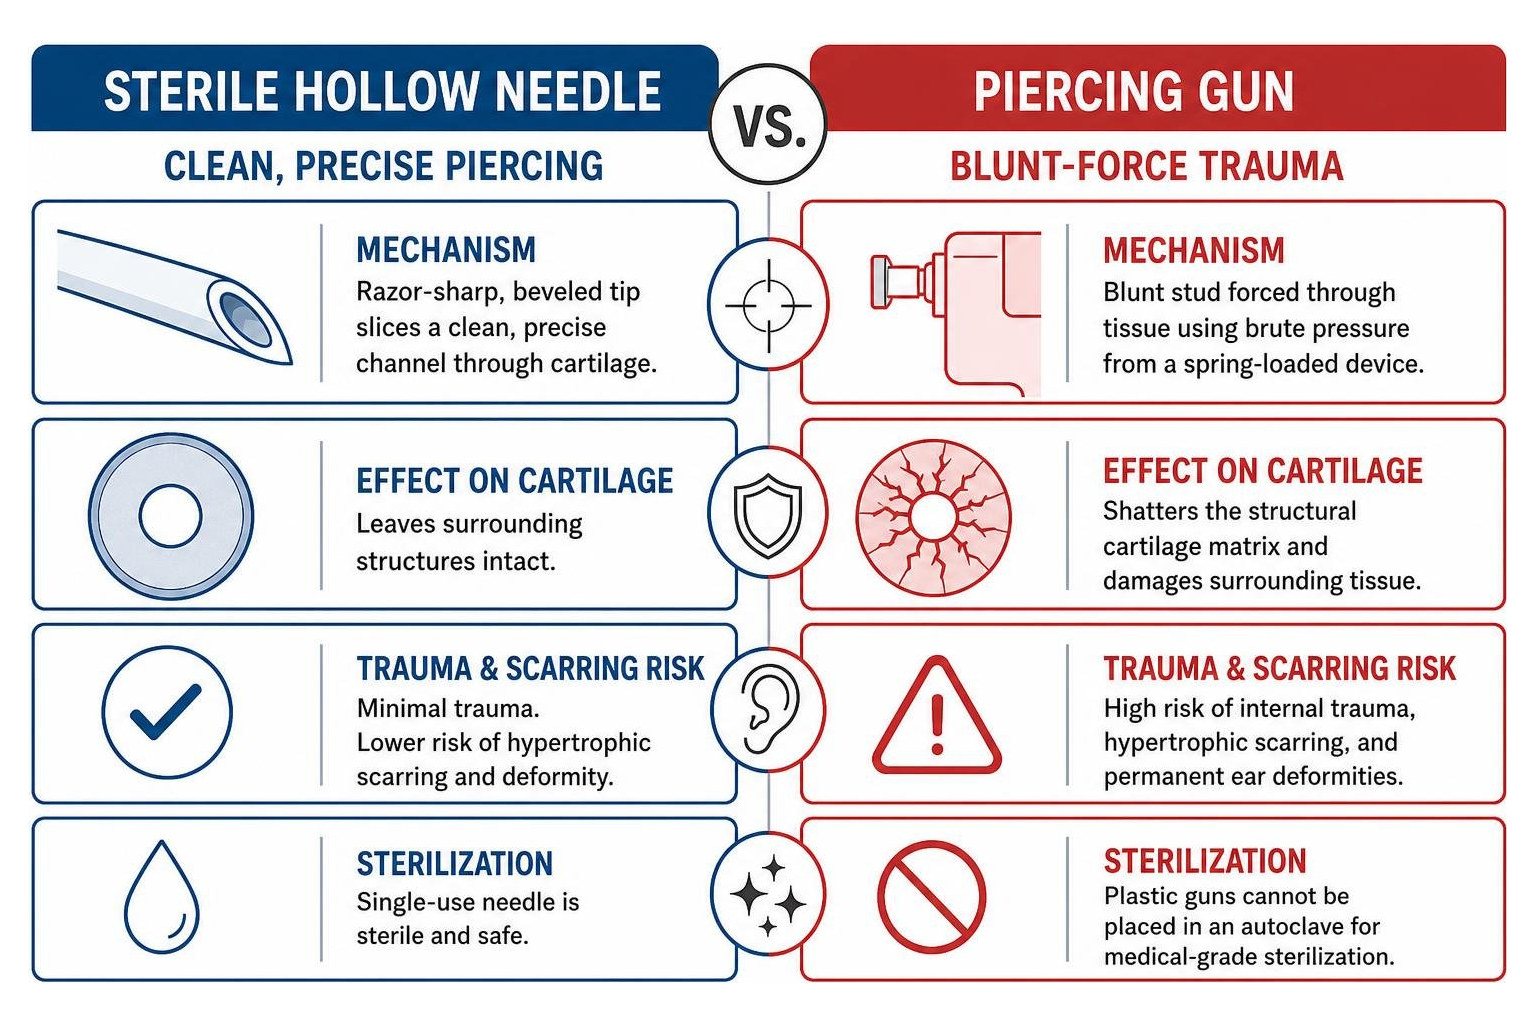
- Sterile Hollow Needles: A single-use needle has a razor-sharp, beveled tip that slices a clean, precise channel through the cartilage, leaving surrounding structures intact.
- Piercing Guns: Guns force a blunt, dull earring stud through tissue using brute pressure. This mechanical blunt-force impact can shatter the structural cartilage matrix, cause severe internal trauma, provoke hypertrophic scarring, and lead to permanent ear deformities. Furthermore, plastic piercing guns cannot be placed in an autoclave for medical-grade sterilization.
Healing Timeline, Aftercare Protocol and Troubleshooting
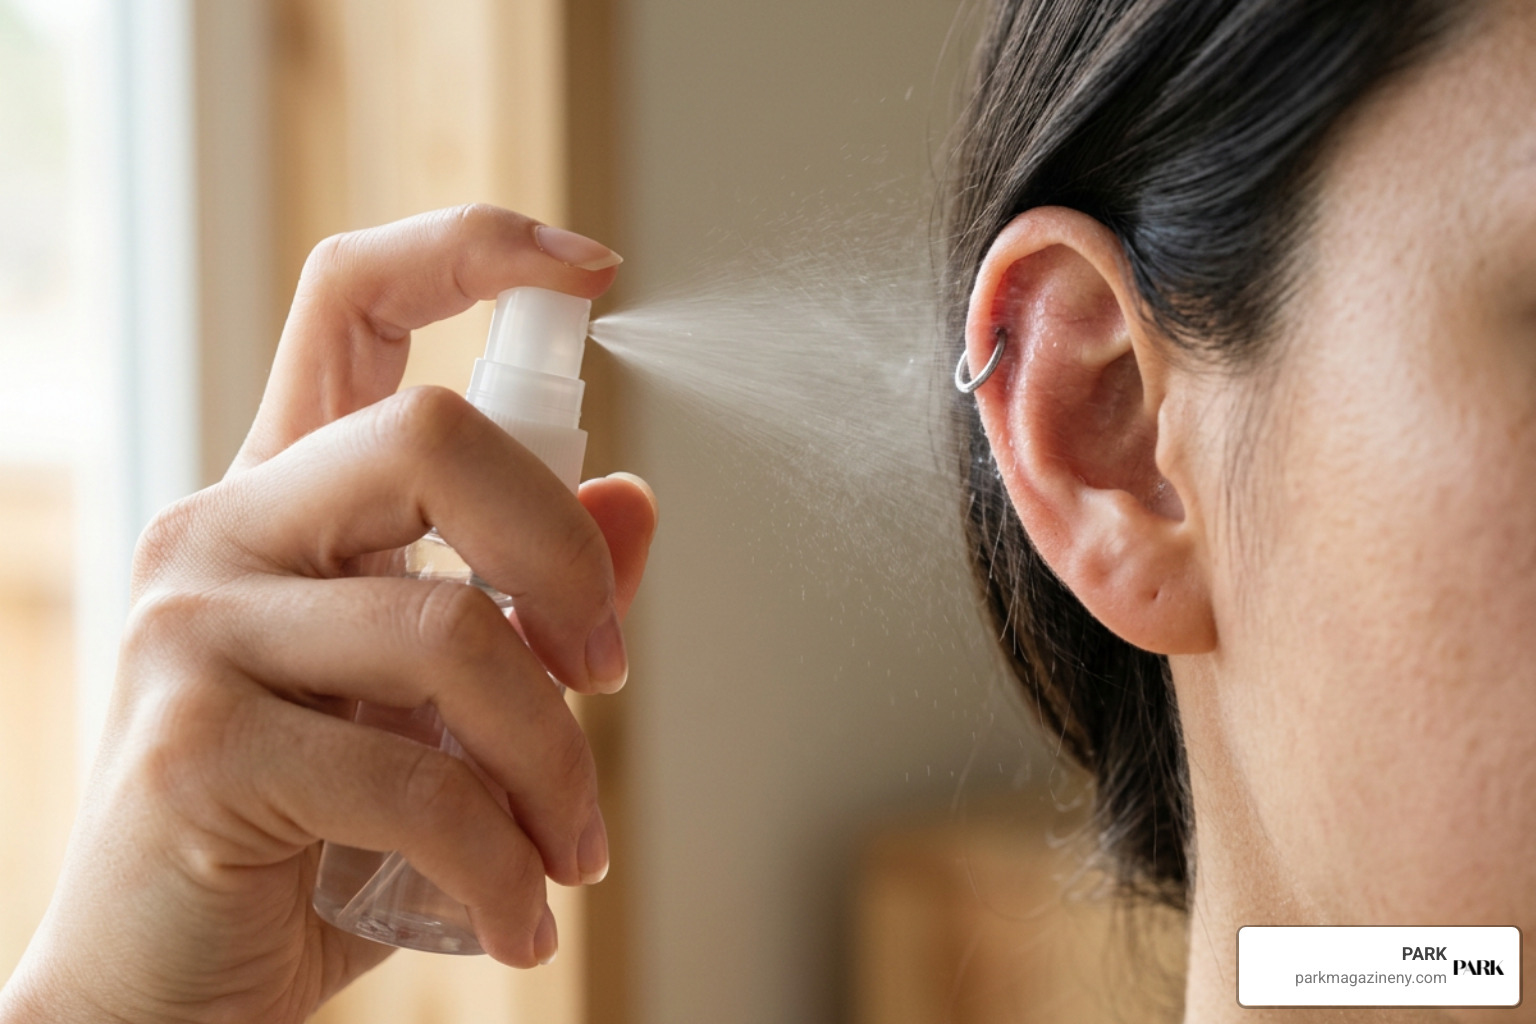
A successful healing journey requires patience and consistent daily habits. Maintaining a healthy piercing mirrors the art of accessorizing without overcomplicating your outfit—simplicity and mindful curation yield the cleanest results.
The 6 to 12 Month Healing Journey and the False Heal Phase
Cartilage recovery follows distinct biological phases:
- Weeks 1–4 (Acute Phase): Swelling, localized redness, warmth, and lymphatic fluid discharge (“crusties”).
- Weeks 6–8 (Downsize Milestone): Acute swelling has resolved. You must visit your piercer to switch the original, longer healing post to a shorter, flush-fitting post to prevent angle shifts.
- Months 2–4 (The “False Heal” Trap): The external openings look completely smooth and calm. However, the internal fistula tunnel remains thin, raw, and vulnerable to tearing. Do not rotate the jewelry or change to a hoop during this phase.
- Months 6–12 (Full Maturation): The fistula channel thickens, strengthens, and permanently seals.
Daily Saline Care, Sleeping Habits and Bump Troubleshooting
Follow the LITHA principle (Leave It The Heck Alone). Clean the area twice daily by spraying both sides with sterile 0.9% sodium chloride saline solution. Gently blot the area dry using non-woven medical gauze or a disposable paper towel. Avoid cotton swabs, which leave behind microscopic fibers that snag on jewelry.
To prevent pressure irritation, sleep with your ear placed inside the opening of a donut pillow or travel cushion.
| Complication Type | Physical Appearance | Root Cause | Primary Resolution |
|---|---|---|---|
| Mechanical Irritation Bump | Red or flesh-colored small raised bump next to the hole; tender to touch | Sleeping on the ear, snagging, long posts, or premature hoop wear | Eliminate friction, downsize long posts, apply sterile saline twice daily |
| Moisture Pustule | Small, soft, blister-like pocket containing white or clear fluid | Trapped moisture around the piercing post from damp hair or sweating | Dry piercing thoroughly with non-woven gauze or a cool hair dryer after showers |
| Keloid Scar | Large, firm, fibrous tissue growth that extends far beyond the original puncture | Genetic predisposition; excessive collagen overgrowth | Dermatological intervention (corticosteroid injections or surgical removal) |
| Cartilage Infection (Perichondritis) | Severe spreading redness, intense throbbing heat, thick green/yellow discharge | Bacterial contamination | Immediate medical physician visit for oral antibiotic treatment |
Jewelry Selection, Sizing and Ear Curation Strategy
Selecting fine jewelry for a cartilage piercing requires balancing metal biocompatibility with proper proportions, much like the art of stacking natural stone jewelry without overdoing it. In luxury shopping destinations, studios such as MARIA TASH demonstrate how high-grade materials elevate cartilage styling.
Initial Helix Piercing Jewelry Materials and Sizing
Starter jewelry must accommodate initial post-piercing swelling while eliminating contact allergies:
- Materials: Use ASTM F136 implant-grade titanium or solid 14k/18k gold. Avoid 316L surgical steel during early healing, as its nickel content can trigger allergic contact dermatitis.
- Style: A straight flat-back labret stud with a smooth, threadless or internally threaded disk that rests flush behind the ear rim.
- Gauge Size: The standard industry baseline is 16G (1.2mm) for structural stability, though 18G (1.0mm) is occasionally selected for delicate ears.
- Starter Post Length: Usually 8mm to 10mm (5/16″ to 3/8″) to allow room for tissue expansion.
Transitioning to Hoops and Architectural Ear Stacking
Transitioning from a healing labret stud to a sleek cartilage hoop is a major style milestone. Before switching, review piercedaddiction.com to verify inner diameter sizing based on your ear anatomy.
- Seamless Rings: Create an unbroken metal line, adjusted by gently twisting the ends sideways.
- Hinged Clickers: Feature a built-in hinge that clicks securely shut, making at-home swaps straightforward.
- Diameter Guidelines: Lower-to-mid helix placements generally require a 6mm to 8mm inner diameter. Upper helix piercings typically need an 8mm to 10mm hoop to wrap comfortably around the outer cartilage rim without pinching.
When styling an entire ear, leave intentional “negative space” between stacked pieces to allow your jewelry to stand out cleanly.
Frequently Asked Questions About Helix Piercings
When can I safely change my helix jewelry myself?
You should wait at least 6 to 12 months before swapping the starter post for a hoop or decorative end yourself. For your first jewelry swap, have a professional piercer assess the internal fistula under proper lighting.
What is the 2/3 piercing rule for cartilage?
The “2/3 Rule” is a professional piercing standard recommending that you heal no more than 2 to 3 cartilage piercings at the same time. Because cartilage has limited blood supply, overburdening your immune system with multiple healing wounds can delay recovery and increase irritation.
Can I sleep with over-ear headphones during healing?
No. Over-ear headphones press directly against the outer cartilage rim, causing mechanical angle shifts and irritation bumps. Switch to loose in-ear buds or bone-conduction headphones throughout the 6-to-12-month healing period.
Conclusion
A helix piercing is a timeless, adaptable addition to any curated fine jewelry collection. While the 6-to-12-month healing process requires patience, the lasting payoff is an elegant aesthetic that endures for decades.
By choosing an experienced professional needle piercer, prioritizing implant-grade metals, and sticking to consistent saline aftercare, you can look forward to a comfortable healing journey. If you appreciate refined craftsmanship and building a personal collection with lasting value, explore our guide to luxury investments worth considering.