How Can Beginners Improve Their Diamond Painting Techniques to Save Time?
Diamond painting can feel slow at first, especially for those just starting out. The small beads and detailed patterns often take more time than expected. Beginners can save time by learning simple techniques that make placing diamonds faster and more accurate. With the right habits, the process becomes smoother and more enjoyable.
Many people focus only on completing the design, but speed often depends on preparation. A well-organised workspace, clear tools, and smart placement methods reduce mistakes and wasted effort. As a result, projects finish sooner without sacrificing quality.
This guide explores practical ways to build speed without losing the fun of the craft. From efficient techniques to better use of tools, every step helps create a polished piece in less time.
Necessary Time-Saving Diamond Painting Techniques
Small adjustments in preparation and method can reduce wasted effort and keep the process smooth. Choosing the right kit, organising drills in advance, and working in smaller sections all help beginners finish projects faster without lowering the quality of the artwork.
Choosing the Right Diamond Painting Kit and Canvas Size
A beginner often saves the most time by starting with the right kit. The best diamond painting kits include all necessary tools, a clear chart, and a canvas with strong adhesive. A complete kit avoids delays caused by missing supplies or poor materials.
Canvas size also matters. A very large canvas demands more time and patience, while a very small one may feel cramped. Beginners usually benefit from a medium-sized canvas with fewer colours, as it balances detail with speed.
Design complexity also affects progress. Simple images with larger colour blocks allow quicker placement of drills. Highly detailed patterns with frequent colour changes slow the pace. Therefore, selecting a design that matches the crafter’s skill level saves both time and frustration.
Selecting Between Round and Square Diamonds
The shape of the diamonds influences both speed and the final look. Round diamonds are easier to place because they require less precision. Their slightly curved edges fit quickly onto the canvas, which makes them ideal for beginners who want faster progress.
Square diamonds create a tighter, more detailed finish. However, they demand careful alignment, and that extra effort increases the time needed for each section. For those who value speed over precision, round drills are often the better choice.
On the other hand, anyone who prefers a polished, seamless result may accept the slower pace of square drills. A clear understanding of personal goals—speed versus detail—helps beginners decide which shape saves them the most time in the long run.
Organising Diamond Drills for Efficiency
Loose drills can easily cause confusion and wasted minutes. Sorting them before starting avoids constant searching later. Small storage boxes, resealable bags, or pill organisers keep colours separated and easy to reach.
Labelling each container with the corresponding symbol or number from the chart speeds up colour changes. This step prevents mix-ups and allows the crafter to maintain a steady rhythm.
Some crafters also pour only a small number of drills into the tray at once. This reduces spills and makes it easier to keep the diamonds upright. A tidy system for drills not only saves time but also keeps the workspace less stressful.
Dividing the Canvas into Manageable Sections
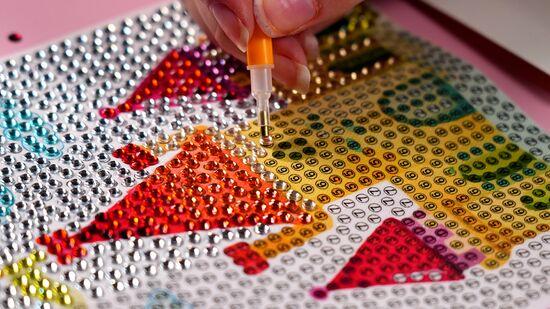
Working on the entire canvas at once often leads to mistakes and wasted effort. Instead, peeling back only a small section of the protective film helps maintain focus and keeps the adhesive clean.
Many crafters use washi tape to mark off neat squares or rectangles. This method creates clear boundaries and makes the project feel more achievable. Completing one section at a time provides a sense of progress without overwhelming the crafter.
This approach also reduces the risk of dirt or dust sticking to exposed adhesive. By finishing smaller areas in sequence, the artwork stays neat, and the crafter avoids redoing misplaced drills. Over time, this structured method proves faster and more efficient than working randomly across the canvas.
Optimising Workspace and Tools for Faster Diamond Art
A smooth diamond art process depends on a clear work area, proper lighting, and tools that reduce strain. Good organisation and the right accessories help beginners save time while keeping their projects neat and accurate.
Setting Up a Well-Lit, Flat Work Area
A flat, stable surface allows the canvas to stay straight and prevents drills from sliding. Many beginners use a desk or table, but even a sturdy board placed on the lap can work well. A smooth base reduces air bubbles and keeps the adhesive layer in good condition.
Lighting also matters. Natural daylight is best, but a bright desk lamp with a cool bulb can reduce eye strain. Poor lighting leads to misplacement of drills and slows progress.
Comfort should not be ignored. A supportive chair helps maintain posture during long sessions. Sitting correctly avoids back or neck pain, which can distract from the task and reduce focus on the painting with diamonds.
Using a Light Pad for Improved Visibility
A light pad sits under the canvas and shines through the symbols, making them easier to read. This tool is especially helpful with darker colours or very detailed patterns. Beginners often find that a light pad reduces mistakes and speeds up placement.
The brightness level should be adjustable. Too much light can cause glare, while too little makes symbols hard to see. A medium setting usually works best for extended sessions.
A light pad also helps line up drills more evenly. Clear visibility means less time spent correcting misplaced beads. For large projects, this small tool can save hours of work.
Employing Ergonomic Pens and Tweezers
Standard diamond pens can feel uncomfortable after long use. An ergonomic pen with a wider grip reduces hand fatigue and allows steadier placement. Some pens also support multi-placer tips, which let the user place several drills at once for faster progress.
Tweezers are another useful tool. They help remove misplaced drills without damaging the canvas. Fine-point tweezers also allow precise adjustments, especially on tighter sections of the design.
Keeping pens clean is important. Old wax inside the nib can block drills from sticking properly. A quick clean and fresh wax refill keeps the tool working smoothly.
Managing and Storing Leftover Diamonds
Leftover diamonds can quickly become messy if not stored properly. Small containers, such as boxes with compartments, keep colours separate. Labelling each section with the correct code saves time during future projects.
Simple household items like egg cartons or ice cube trays also work well for sorting. Clear containers make it easier to identify colours at a glance.
Spilled drills are common, but they can be collected with a lint roller or a small handheld vacuum. This prevents waste and keeps the workspace tidy. Proper storage means leftover diamonds remain ready for repairs or new diamond art projects.
Conclusion
Beginners can save time in diamond painting by preparing their workspace, sorting drills by colour, and keeping tools within reach. These small steps reduce interruptions and help them stay focused.
They also gain speed by using multi-placer pens, choosing round drills, and dividing the canvas into sections. Each method allows for smoother progress and fewer errors.
Good lighting, short breaks, and proper sealing at the end further support both accuracy and efficiency. With steady practice, they develop a rhythm that makes the process faster and more enjoyable.